Category Cuisine

Olive’s Chilled Watercress Soup

After pulling out copious quantities of weeds from my garden the other day, my body was crying out for greens. I decided to let my British shine, pull a Mrs. Patmore (TV series Downton Abbey’s quick-witted head cook), and cook up a pot of Chilled Watercress Soup.

Watercress doesn’t seem as popular today as it was when I was a child. When I saw a farmer rave about watercress on a recent Jamie Oliver episode, I decided it was high time that I got better acquainted with this healthy green.

Watercress

Here is my version of Chilled Watercress Soup, refreshing and satisfying. It’s a fast and easy recipe. Olive to make up a batch, store it in the fridge, then pull it out for a quick lunch or serve it in small bowls as an elegant starter to a summer dinner.

Olive's Chilled Watercress Soup

Now, where’s that Daisy to help me with the dishes?

Olive’s Chilled Watercress Soup

2 tablespoons olive oil
1 yellow cooking onion, chopped
6 mini potatoes, skin left on, sliced
4 cups cold water
2 bunches watercress, large stems removed, washed carefully, spun dry
1 knob of butter (A British term which means about one or two tablespoons. The precise amount is not critical. The point is you decide and just eyeball it)

Heat the olive oil in a large saucepan over medium heat. Add the potatoes and onions. Season to taste with salt and pepper. Sauté for about 5 minutes or until onions are tender,  stirring frequently so that potatoes don’t stick.

Stir in the water. Bring to a boil, and then reduce heat to medium. Simmer until potatoes are tender, about 10 minutes.

Add the watercress and simmer just until the watercress is wilted but still bright green, only about 1 to 2 minutes. Remove from heat immediately. Stir in the butter.

Let cool, then carefully purée in a blender or food processor until smooth. Adjust salt to bring out the flavour, if necessary. Chill in the fridge. Serve cold, straight from the fridge. Garnish with a tablespoon of light ricotta cheese, a crumble of soft chèvre, or a sprinkling of snipped chives.

Read More

Strawberry Tart & Supermoon: Welcome Summer!

What better way to celebrate the arrival of summer than under a perigee supermoon (the closest and largest full moon of 2013)…

Supermoon 2013

with an equally spectacular strawberry tart?

Olive's Strawberry Tart

My Strawberry Tart is a simple but elegant way to showcase the fragrant, local field strawberries that I picked up at Streetsville Farmers’ Market on Saturday.

Local Field Strawberries

Based on the gorgeous fruit tarts popular in France during festival time, my recipe is an easy and relatively healthy summer dessert that looks almost as stunning as a tarte aux fraises from a fine Parisian pâtisserie. After listening to the utterly charming audiobook French Women Don’t Get Fat (read by the author herself, Mireille Guiliano), I learned that the fattening pastry cream, that is often spread over the base of a tarte aux fraises, is not necessary. Great, because I am not crazy about pastry cream, but olive strawberries!

Olive's Tarte aux Fraises

There are a few easy steps to this tart. You can make the simple syrup required for the coulis well in advance. It keeps for 2 to 3 weeks in your fridge and can be used to dress a fruit salad or to sweeten homemade lemonade or ice tea.

Bake the crisp, shortbread cookie crust in the morning, filling your kitchen with a delicious aroma, then set it aside to cool. It has a hint of ground almonds, which you can replace with flour if there are allergy concerns.

Later (at least two hours before you want to serve the tart), fill the tart with a concentric arrangement of the prettiest, similar-sized, scarlet-coloured strawberries you can find. Then make the coulis and glaze the berries immediately. The berries will glisten under the coulis; both will perfume the air with sweetness. Refrigerate the tart for at least two hours to allow the coulis to set. It’s best eaten the day it’s made but it is still good the next day or two, with a softer crust. Serve with a dollop of whipped cream if you wish.

You can use other seasonal fruit instead, such as raspberries, peaches, or apricots (but not kiwi, pineapple, papaya, or figs). Make sure you use the same fruit for the coulis.

Olive’s Strawberry Tart

Simple Syrup:

1 ¼ cups white granulated sugar
1 cup water

Combine the sugar and water in a saucepan and heat gently until sugar has dissolved, stirring a couple of times. When the sugar is completely dissolved, bring to a boil and reduce heat to medium. Boil for 5 minutes. Cool before storing in a covered jar in your fridge for up to 2 to 3 weeks. Can be used to dress a fruit salad or sweeten homemade lemonade or ice tea.

Shortbread Cookie Crust:

1 cup flour (measured by spooning flour into cup and leveling off with a knife)
1/3 cup finely ground almonds (option: replace with an equal amount of flour)
1/3 cup firmly packed light brown sugar
1/4 teaspoon salt
2/3 cup cold unsalted butter, cut in small cubes

Preheat oven to 325°F. Lightly butter the bottom and sides of the inside of a 10” round tart pan with straight, fluted sides and a removable bottom.

Mix the flour, ground almonds, brown sugar, and salt in a medium bowl with a whisk until combined. Cut in the butter by rubbing the flour mixture and butter between your fingertips, until the mixture blends into coarse crumbs. Knead gently with your hands to form a ball.

Distribute pieces of the dough evenly onto the bottom and up the sides of the pan. Using the heel of your hand, pat the dough to cover the bottom and sides evenly. Make sure there are no gaps. Bake on the middle oven rack for about 15 minutes, until golden brown. Cool completely before adding the fruit.

Strawberry Filling & Strawberry Coulis Glaze:

2 quarts of strawberries, washed, dried thoroughly, and hulled but left whole

Pick out the best-looking, similar-sized berries and arrange them on top of the crust in an attractive, concentric pattern, with their tips pointing up and their hulled ends pointing down.

Note: You will need approximately 1 ½ quarts of strawberries to fill the tart and for the coulis but buy 2 quarts just to be sure and to allow you to pick out enough of the best berries for the tart. You will need 1 ½ cups of strawberries for the coulis.

Coulis Glaze:

3 gelatin sheets
1 1/2 cups whole ripe strawberries, hulled
A squeeze of lemon juice
4 tablespoons Simple Syrup (see recipe above)

Prepare the gelatin sheets according to package directions, first following the Basic Directions and then the Cold Preparation Directions.

Meanwhile, purée the raw strawberries with a squeeze of lemon juice in a food processor. Add the simple syrup and blend. Strain through a sieve into a bowl, rubbing through with a rubber spatula. Discard the seeds and remaining pulp.

Before the gelatin begins to set, fold the gelatin into the strained coulis; then immediately pour the coulis evenly over the tart to glaze each berry. Refrigerate the tart until the coulis is set, about 2 hours. Store any leftovers in the fridge.

Note: I learned the basics of simple syrup, coulis, and glazes from the Gordon Ramsay Desserts cookbook. He uses many interesting ingredients to whip up different variations of flavoured stock syrups, coulis, and glazes. It’s well worth checking out the cookbook, available from the Mississauga Library. I modified his recipes for Stock Syrup and Coulis to fit the requirements of this recipe.

Read More

Simple Oven-Roasted Asparagus

Olive local field asparagus. I have eaten so much of it this season that it’s practically growing out of my ears. I have been longing to taste asparagus raw, the moment after it is freshly picked. I really wanted to make it out to Andrews’ Scenic Acres to pick my own asparagus this season but it was raining every day that was available to me to make the trip. I even thought of delaying this post by one day so I could get out there today. Guess what it’s doing this morning? Raining! Thankfully, there has been plenty of local field asparagus available at our local farmers’ markets.

Field Asparagus - Lise

Olive asparagus prepared in many different ways but my go-to recipe is a healthy, simple oven-roasted asparagus that once cooked, needs little (if any) adornment – perhaps just a squeeze of lemon.

I prefer to eat my asparagus the day I buy it but it will keep in your fridge okay for 2 to 3 days if you stand the stem ends in a jug of water or wrap them in a damp paper towel and cover the bunch in plastic wrap.

Simple Oven-Roasted Asparagus

Serves 3 to 4

You could also grill the asparagus on your barbeque, instead of roasting it in the oven.

Ingredients:

1 bunch of asparagus
1 tablespoon of olive oil
coarse salt to taste

Directions:

Preheat oven to 425°F. Hold asparagus loosely near the end and snap off the tough end where it breaks naturally. Wash asparagus carefully in cold, running water, paying special attention to the head where sand and grit get trapped. Drain well and pat dry.

Pile the asparagus on a parchment-lined, rimmed baking sheet. Drizzle with olive oil and sprinkle with  salt. Toss until evenly coated with oil. Spread the asparagus out in a single layer on the baking sheet, making sure that stalks are not touching each other. Roast on the middle rack for about 10 minutes, depending on the thickness of the spears, until asparagus is tender but still slightly firm. Asparagus will have acquired lovely little caramelized spots here and there. Serve hot, cold or at room temperature.

Asparagus1

My Simple Oven-Roasted Asparagus is lovely as a vegetable on your dinner plate but just as nice in a salad.

I once saw this idea on the pages of one of my beloved Gourmet magazines and have been smitten with it ever since. Olive to top my Simple Oven-Roasted Asparagus with a soft poached egg, then squeeze on some fresh lemon juice, sprinkle on a few shavings of Parmigiano-Reggiano, some fleur du sel, and a cracking of freshly ground black pepper. The lemon and egg yolk mix together and make a bright, rich sauce that compliments the robust asparagus beautifully. Simple perfection. Guilt-free breakfast or lunch. One happy Olive.

Asparagus2

Andrews’ Scenic Acres
9365 10th Sideroad
Halton Hills, Ontario
 
Telephone: 905-878-5807

www.andrewsscenicacres.com


View Larger Map

Read More

The Danish Pastry House: Delightful!

A tip from a reader has helped me unearth a real gem in Port Credit – The Danish Pastry House, home of a wide variety of beautifully handcrafted, authentic Danish pastries and desserts.

danish_pastry_1

Throw out your disappointing grocery store danish. It isn’t worth the calories. Head on over to The Danish Pastry House and experience quality that is far superior.

I am so hungry right now that I can smell the cinnamon wafting up from this photo of a Snegl (Danish for “snail” but what we think of as “danish”).

danish_pastry_3

The Danish Pastry House honours traditional recipes and uses fresh, pure ingredients like imported Danish marzipan and almond paste. Preservative and additive free, pastries are baked fresh daily and never sold as day-olds.

Though I visited The Danish Pastry House a few weeks ago, I am still pining over the pastry I ate. The Chocolate Snegl is my absolute favourite. The chocolate, cinnamon, and remonce (butter and sugar mixture) caramelizes in spots at the edges into chewy decadence. The pastry is flaky and flavoursome and the centre is a soft and luxurious pool of chocolate glaze – waiting for you to dive right in. Olive it!

danish_pastry_2

Just look at the light and flaky layers of pastry, baked from fresh Danish dough with no less than 27 layers. Behold the Apricot Spandauer, filled with almond paste and apricot spread. I love the combination of almonds and apricots.

danish_pastry_5

Unfortunately, one or two of the pastries I bought didn’t make it home for the photo shoot – blame me and my son. Ohhh, they were so good! My photos just don’t do them justice and the pastries got hungry-boy-handled a bit on the way home. Please visit their comprehensive website for great photos of an extensive product line at www.danishpastryhouse.ca  (not to be confused with the Danish Pastry House in Medford, Massachusetts on the .com site).

I had the pleasure of meeting the sunny-souled and highly accomplished 2013 Head Pastry Chef, Thea Reinholdt Hansen, who trained in Denmark and graduated with a distinguished Pastry Chef certification. Ms. Reinholdt Hansen has joined The Danish Pastry House for one year, while Owner/President Anita Lauritsen prepares to open their first retail bakery in 2013. What great news for Mississauga!

If I can have only one decadent treat a week, let an exquisite artisanal pastry from The Danish Pastry House be it. Well worth a week of hard training, I’d drive from anywhere in our region to get one. Opening hours are limited so check first before you go.

Update: The Danish Pastry House has moved to Oakville. Check my Grocery/Gourmet Store/Bakeries Directory for location details.

www.danishpastryhouse.ca

Read More

Grilled Trout with Tahina Sauce and Grilled Lemons

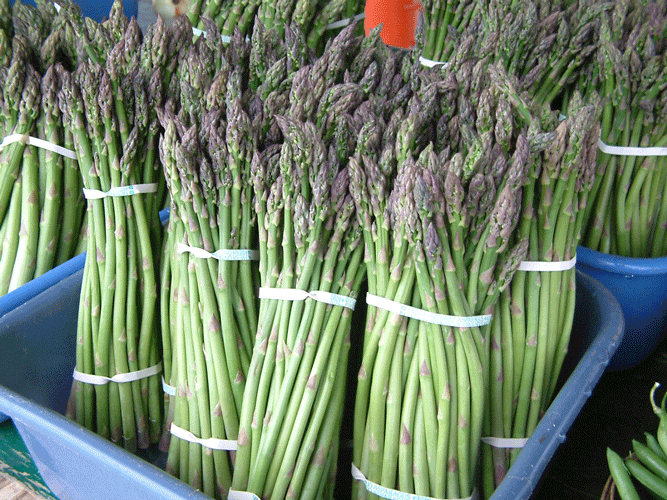
Olive Middle Eastern food. Healthy and flavourful, it always makes me feel good after I eat it. I fell in love with Middle Eastern food almost at the same moment that I fell in love with my Egyptian husband. First the husband, then his family, then the food.

My husband’s family are talented cooks who love to host gastronomical extravaganzas.  Every generation of the family gathers around one long table, lavishly laden with delicious food. There is lots of love, laughter, good wine and even the odd heated debate just to keep things lively. They take food seriously and whether cooking Middle Eastern, French, Spanish, Italian, British, or Quebecois, they always search out the finest ingredients and prepare them carefully. Soon we will be welcoming Southeast Asian cooking into our wonderful, multicultural clan.

My mother-in-law, Mado, is a fabulous cook (and a lovely mother-in-law). Years of practice have perfected her cooking and engrained her recipes in her memory. There is nary a cookbook in sight. When I visit, I try hard to watch, translate, and learn so I can pass her recipes down to generations to come.

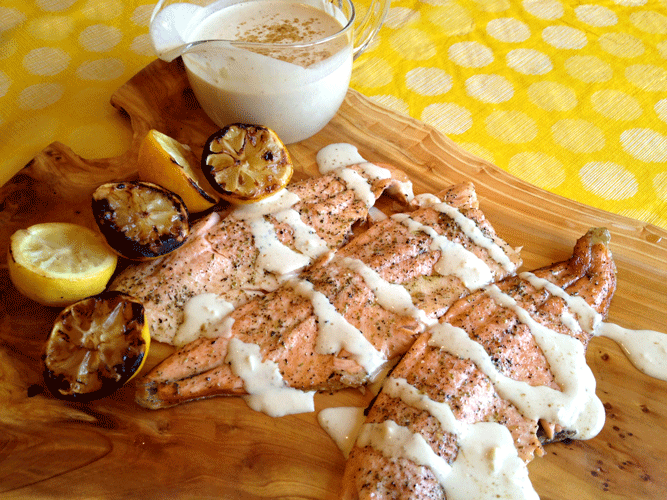
My mouth still waters when I recall a simple barbeque she held at her home one summer evening, when I was first getting to know the family. She char-grilled whole red snappers and served them with a delicious, creamy sauce made of ground sesame paste (tahina), lemon, and garlic. It was as yummy as it was unusual. That was my introduction to tahina sauce which quickly grew in to a love affair. Olive it the most on grilled or roasted fish. It’s especially delectable with meaty salmon or trout.

tahini-trout

Olive it drizzled on grilled beef or chicken shish kebabs.

adonis-beef1

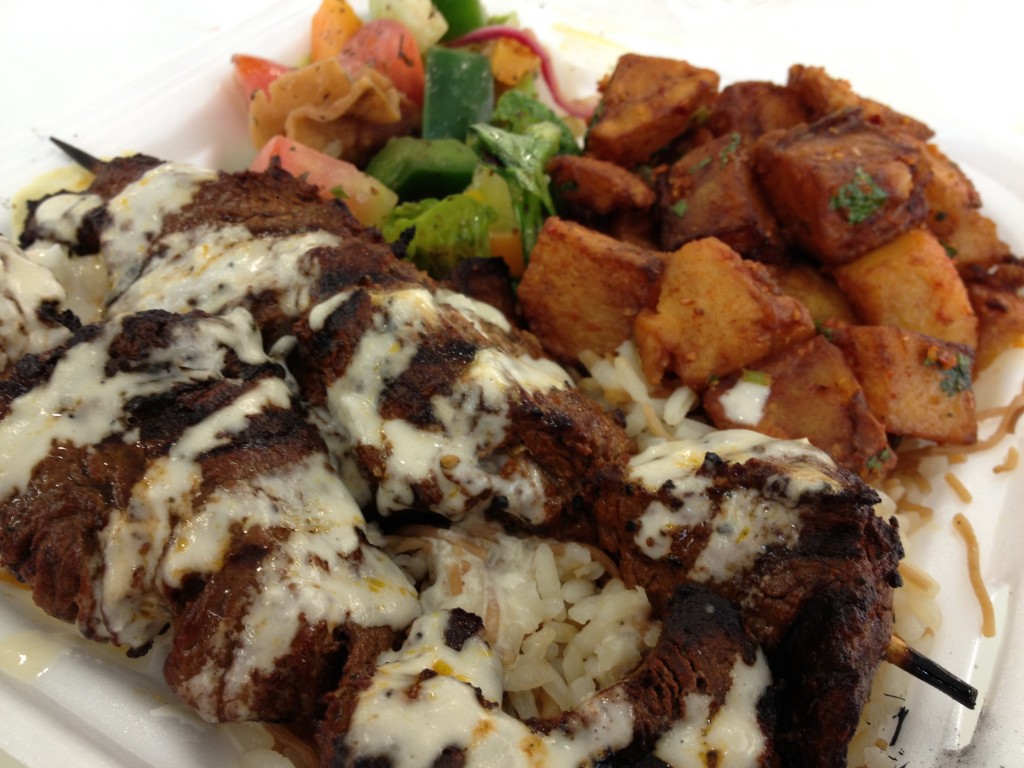
Olive to let it trickle down into my rice.  It heightens the flavour of Lebanese wrapped pita sandwiches, such as shawarma and falafel. It is essential in a good hummus and a good baba ghanoush. It is healthy and it’s so easy to make. Let me teach you how.

First, let’s talk about the ingredients. Here are all of the ingredients that you will need, plus cold water.

tahina

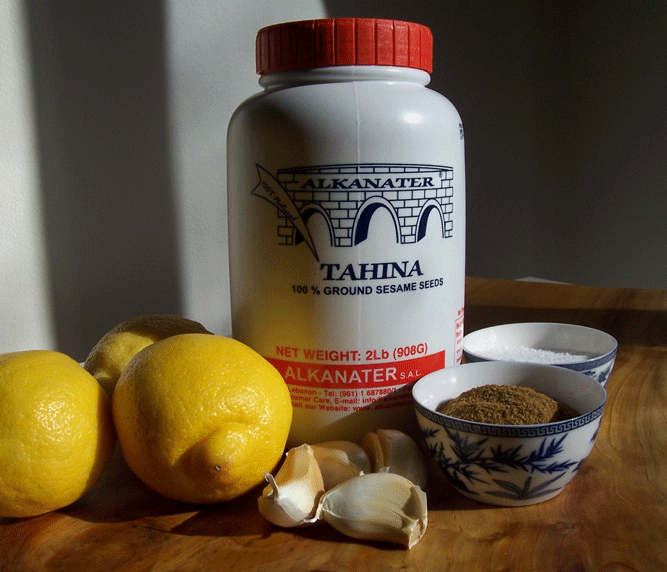
Make sure your lemons are large and roll them under your hand for a spell, to make them easier to juice. Choose four big, fresh cloves of garlic – go bold or go home (okay, do three if you feel a bit wimpy). If you can, buy your ground cumin from an Arabic store, where it has a high turnover and will be nice and fresh. Hmmm, I could smell the earthy fragrance of this cumin as I was taking this photo. This is my favourite brand of tahina paste, available at Adonis or Loblaws.

Store your jar of tahina paste upside down, set in a small bowl, in your cupboard. This will allow the oil on top to rise up through the paste, making it much easier to stir. It will keep in your cupboard for far longer than it will take for you to use it up. Because the paste is so thick, it is very important to stir tahina paste thoroughly before measuring it, to break up any clumps and to mix the oil in completely.

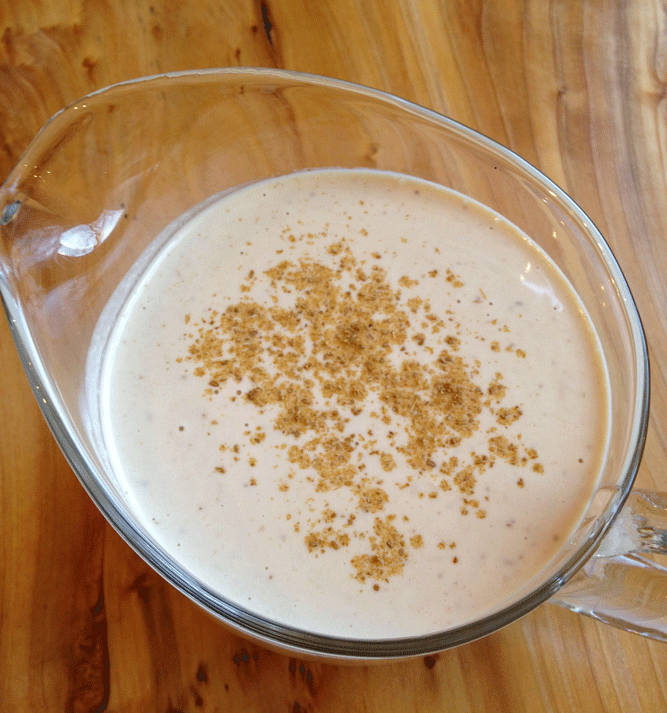
Now, a bit about the method. Tahina sauce needs to be blended properly with cold water. Mado always mixes it by hand, adding the water bit by bit and stirring while it breaks apart, then continuing to stir until it comes back together into a creamy blend. I get the same results in a food processor.

I like to make a batch of tahina sauce at the beginning of the week to serve with grilled fish. And then I use some to make baba ghanoush or hummus later on in the week. If there is any left over at the end of the week, we like to drizzle it over store-bought rotisserie chicken.

tahini

Sauce Tahina Mado

Makes about 2 1/2 cups

1 cup of tahina paste (stir well in jar before measuring)

Juice of 3 large lemons

1 teaspoon of kosher salt

4 garlic cloves, crushed and minced to a purée (in the above salt)

1 teaspoon of ground cumin plus a sprinkle for garnish

About 1 ¼ cup of cold water (depending on thickness of tahina paste – see instructions)

Mado’s Method By Hand:

  1. Before measuring the tahina paste, stir it very well to break up any hard chunks and blend thoroughly. Place the tahina in a medium bowl. Add the cold water, bit by bit, stirring each time. The tahina will separate and stiffen. Continue slowly adding the water (about 1 cup to 1 1/4 cups of water in total) and stirring until the tahina and water come back together into a creamy, pale sauce.
  2. Add the lemon, salt, garlic, and cumin. Stir well. Adjust the salt to taste, to bring out a punch of lemon and garlic. Add more lemon, if necessary. Garnish with a light sprinkle of cumin. Store in the refrigerator.

Food Processor Method:

  1. Before measuring the tahina paste, stir it very well to break up any hard chunks and blend thoroughly. Place all of the ingredients, except for the water, in a food processor.
  2. Add the water slowly, using just enough to end up with a pale, smooth, creamy sauce (about 1 cup to 1 1/4 cups of water in total). The tahina will separate and stiffen at first and then become smooth. Adjust the salt to taste, to bring out a punch of lemon and garlic. Add more lemon, if necessary. Garnish with a light sprinkle of cumin. Store in the refrigerator.

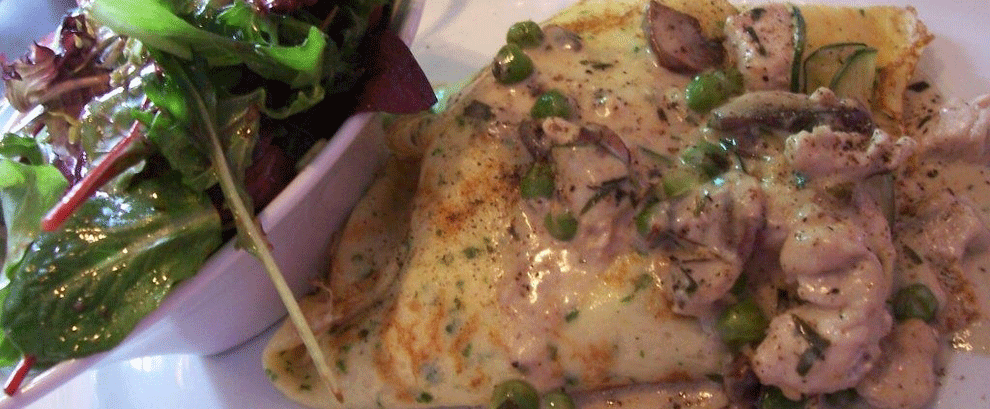
Simple Grilled Fish (wonderful with Tahina Sauce)

Trout, salmon or red snapper fillets

Extra-virgin olive oil

Kosher salt

Freshly Ground Black Pepper

Dried Marjoram

  1. Place fillets on a large piece of heavy-duty aluminum foil. Turn up the edges of the foil to make a rim (so that the oil doesn’t leak out on to your grill).
  2. Dress the fillets with a light drizzle of extra-virgin olive oil, a sprinkling of kosher salt, a grinding of black pepper, and a dusting of dried marjoram.
  3. Grill the fish on the foil, at 425 degrees, until white proteins start to come to the surface and the fish is done to your liking. It will continue to cook a bit as it rests off of the grill. Alternatively, place on a baking sheet and roast in a 425 degree oven. Serve with a drizzle of tahina sauce and garnish with grilled lemons or fresh lemon halves.

Grilled Lemons

Lemons

Extra-virgin olive oil

  1. Cut some lemons in half. Toss in some olive oil.
  2. Place, cut side down, on a grill and grill for as long as the fish cooks, until slightly charred. Serve as a garnish for fish. Use caution when squeezing to avoid being burned by the hot juice.

One last thing. After every fish dinner, Mado recites “Après le poisson, il faut le dessert” (after fish, you must have dessert). And so I am leaving you with a little treat.

adonis-mangue

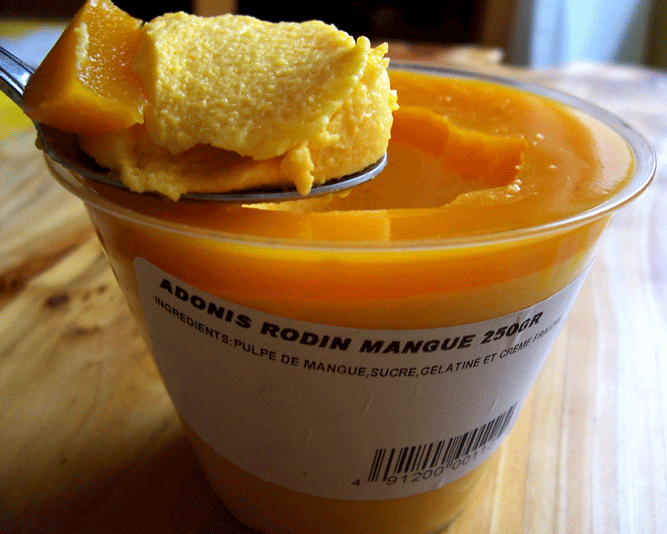
Adonis Rodin Mangue mango mousse – 250 decadent grams of sheer heaven. Made of luscious mango pulp, sugar, gelatin, and crème frâiche. Enough to share. The perfect treat after fish! Olive it!

Read More