Category Archive of Recipes

Memories of Myanmar: Spicy Tomato Cabbage Salad

Okay, I admit it: I’ve never been to Myanmar and so…have no memories of it. Instead, I live vicariously through people like award-winning Canadian culinary travel writer Naomi Duguid and CNN’s Anthony Bourdain, who guide us through the doors of a country whose society is now opening up after 50 years of isolation, and introduce us to the seductive flavours of its exotic cuisine.

Anthony Bourdain’s engaging episode on Myanmar (formerly Burma), from his show Parts Unknown, awoke in me an appetite for Burmese cuisine – a distinctive and delicious melting pot of flavours influenced over time by Myanmar’s bordering countries of India, China, and Thailand. I love the concept of Burmese salads: condiments may be sprinkled on bite-by-bite to make each mouthful a different combination of textures and flavours suited to individual tastes. So I created a salad tailored to my taste, loosely inspired by what I saw on the show but simplified, using ingredients I could easily find here.

Since then, I happened upon Naomi Duguid’s gorgeous book Burma: Rivers of Flavor while browsing in Indigo recently. The photographs drew me in and the recipes won me over; I’ve been pouring over it ever since. Warming Beef Curry with Tomato is an easy, comforting recipe using commonly found ingredients. The Red Chile Powder recipe is a cinch to make and has a bright heat that creeps up on you, leaving you blanketed in warmth. Next I am going to make the Paneer in Tomato Sauce and the Tart-Sweet Chile-Garlic Sauce so my husband will stop using the grocery store brand that is full of preservatives (he uses it like ketchup). And doesn’t the Intensely Green Spinach & Tomato Salad with Peanuts sound delicious? If you would like to travel vicariously down the rivers of Burma – “the rivers of flavor” – and want to try your hand at authentic Burmese cooking, Ms. Duguid’s well-researched book is your passport. Thank you, Ms. Duguid, for bringing the flavors of Burma into our kitchens.

myanmar_salad

Memories of Myanmar: Olive’s Spicy Tomato Cabbage Salad

Serves 6-8

This is the kind of salad that you’ll want to make when you are not in a rush, perhaps on a lazy Saturday afternoon when you have a hankering for something spicy to liven up your Saturday night dinner. We think it’s refreshing and exotic, even if it’s not an authentic recipe.

Naomi Duguid’s book, Burma: Rivers of Flavor, includes an authentic recipe for Burmese Tea-Leaf Salad, the type of salad which inspired my recipe. Yes, the authentic recipe calls for fermented tea leaves (unlike my recipe). Ms. Duguid describes it as a dazzling salad and Burma’s national dish. She included it in her book as “an act of optimism, in the hope that fermented tea leaves will soon become more widely available”. I’m on the hunt! I’ve asked at T&T Supermarket and my little local Indian grocery store and so far, have come up empty-handed. I sent an e-mail to the Myanmar Cultural Association of Brampton, hoping that they can lead me in the right direction. If I find some, I am going to try Ms. Duguid’s recipe.

Salad Ingredients:

12 cups shredded Napa cabbage (1 medium cabbage)

1 bunch fresh coriander (large stems removed), finely chopped

15 fresh mint leaves, finely chopped in ¼ teaspoon coarse salt

1 bunch green onions, sliced thin

2 cups seeded, finely chopped or julienned fresh tomatoes

6 mini cucumbers, sliced

Crunchy Bits:

1 cup roasted and salted peanuts (I use Spicy Peanuts from the nut counter at Adonis Mississauga to add a little extra heat)

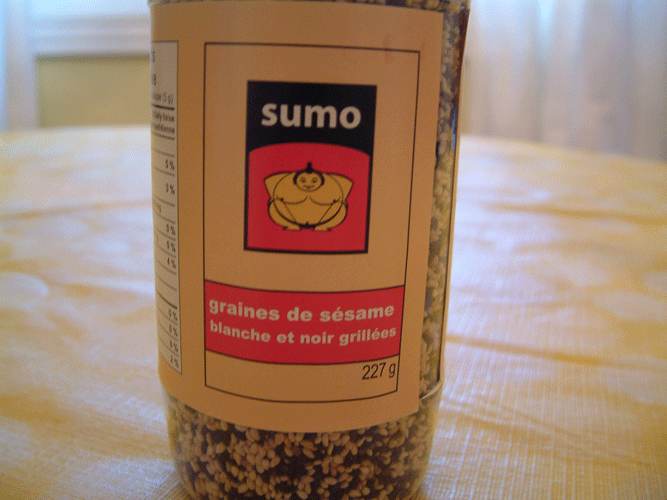
2 tablespoons toasted sesame seeds (olive the Suma brand that is already toasted – see photo below)

Dressing Ingredients:

2 cloves garlic

2 teaspoon ground turmeric

½ teaspoon ground cayenne pepper or homemade red chile powder to taste

2 teaspoon white sugar

½ teaspoon sodium-reduced soy sauce

2 tablespoons rice wine vinegar

Juice of 2 limes

3 tablespoon peanut oil or olive oil

Optional Accompanying Condiments:

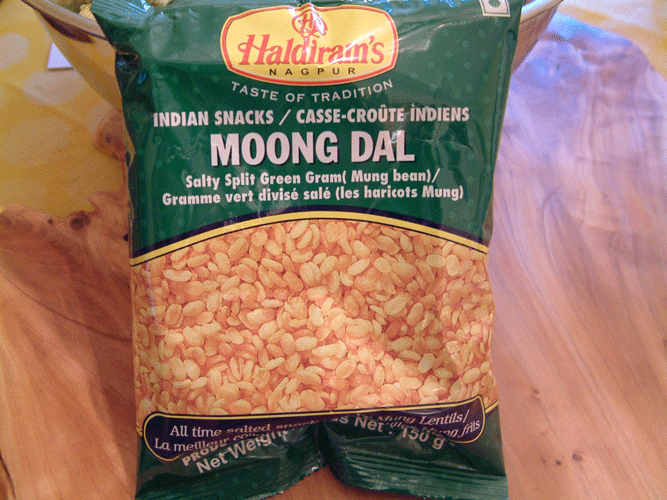
Moong Dal (fried salty split green mung bean snack – see photo below)

Extra ground cayenne or homemade red chile powder or your favourite Asian chili garlic sauce.

Extra minced fresh garlic

Directions:

  1. Place salad ingredients in an oversized salad bowl. If you don’t have one, divide salad ingredients evenly between two large bowls to give you enough room to toss on the dressing. Once dressed, the salad will fill just one large bowl.
  2. Place peanuts in the bowl of a small food processor; chop by pulsing briefly 3 or 4 times, until you have a mix of chopped nuts and ground nut powder; place in a separate serving bowl and set on table. Place the toasted sesame seeds in a separate serving bowl and set on table.
  3. Without washing out bowl, place first 7 dressing ingredients in the bowl of the same small food processor; process until garlic is finely minced. Add oil and blend thoroughly.
  4. Pour dressing on salad; toss thoroughly. Serve immediately, with bowls of the crunchy bits and optional condiments on the side for guests to add individually, to their own taste.

Suma Toasted Sesame Seeds

Sumo brand White & Black Toasted Sesame Seeds are widely available and are usually found at grocery store sushi counters.

Moong Dahl

Moong Dal (fried salty split green mung bean snack) is available at Indian grocery stores and Loblaw’s).

Read More

Happy Under the Apple Boughs: Carl Laidlaw Orchards

This story is as much about the experience surrounding the food as it is about the food – both are utterly impressive.

carl_laidlaw_orchards

Photo contributed by Laura Kelly

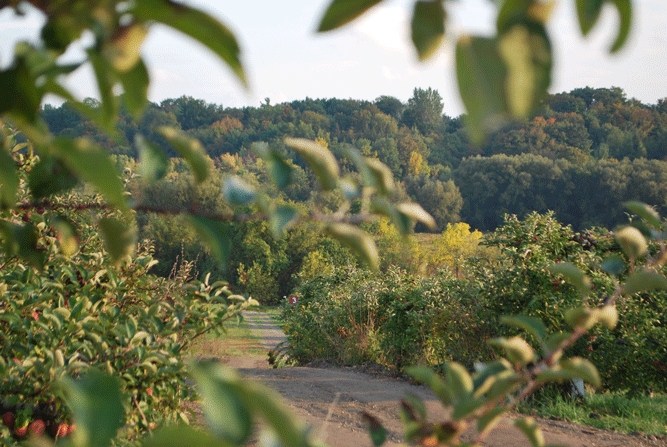
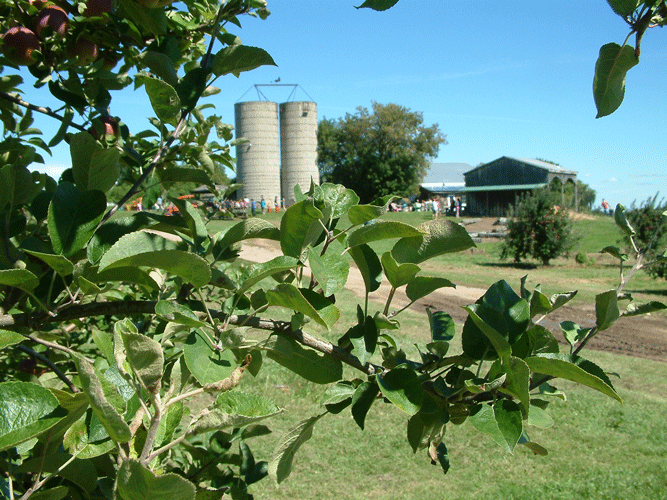
The setting is a picturesque 100-acre farm spread out on the crest of a hill with a breathtaking view of the Credit River where it meanders through Huttonville, a farming community in Brampton, Ontario.
carl_laidlaw_orchards

Photo contributed by Laura Kelly

Let me introduce you to the farmers – Mark and Laura – who are kind-spirited, exceptionally creative, and phenomenal gourmet cooks. Mark finds joy in bringing people back to the natural source of their food.

carl_laidlaw_orchards carl_laidlaw_orchards

Laura’s heart is touched by the families who come to share the magic of the orchard that the Laidlaw family is so fortunate to call both their home and their life’s work.  Laura offers a warm farm greeting to all of the farm’s guests.
carl_laidlaw_orchards

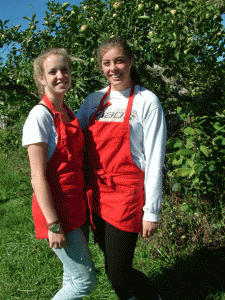
Just as Mark’s parents – Carl & Gwyn Laidlaw – did before them, Mark and Laura work hard to keep the family farm thriving. The old adage, ‘the apple doesn’t fall far from the tree’ couldn’t be more applicable. As the seventh generation on the farm, Mark and Laura’s son and daughter, Spencer and Margo, pitch in to help tend the land that their great-great-great-great-great-grandpa Aaron started to farm back in 1852. (Margo and friend Brooke below).
carl_laidlaw_orchards carl_laidlaw_orchards


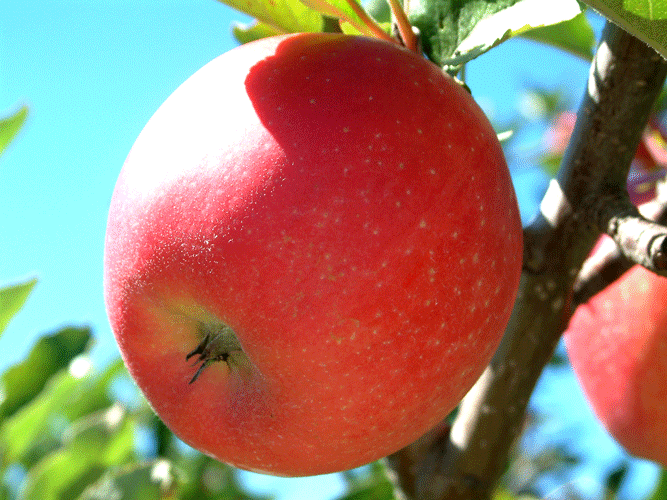
The Laidlaws have always grown some fruit trees on their farm but after planting more orchards in the late 1960s, they started a pick-your-own business in the 1970s which has blossomed ever since. They grow a few varieties of pears and over 20 varieties of apples – more than you will find in the supermarkets!
carl_laidlaw_orchards

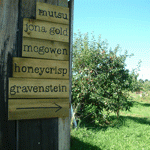
There are wonderful heirloom varieties, such as Tolman Sweet (planted by Aaron Laidlaw in the mid-1800s – now that’s what I call heritage food!), Cortland (developed in the 1890s), McIntosh (1811), Gravenstein (17th century) and what Mark calls the mystery apple: Ginger Gold. Here’s a link to a nice story in the Washington Post explaining how Ginger Gold was created by accident among the replantings of Clyde Harvey’s orchard, after Hurricane Camille ripped out the trees in Virginia in 1969.

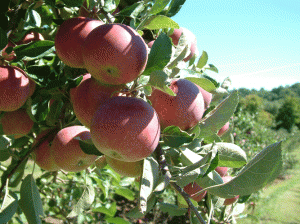
These are some of the many varieties grown at Carl Laidlaw Orchards.

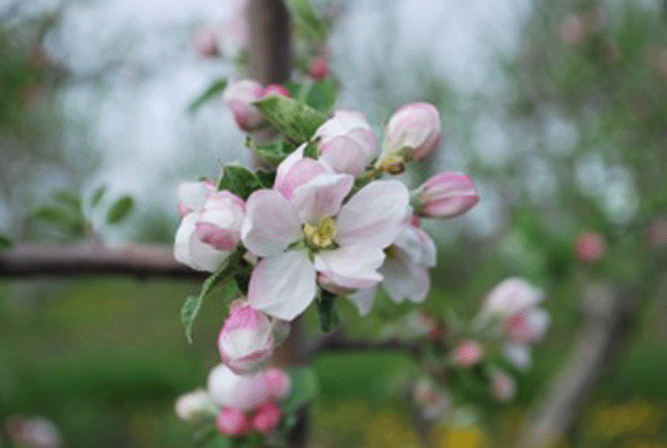
Laura said the spring blossoms have never been more beautiful; it’s going to be a great harvest this year. Laura is such a talented photographer!.
carl_laidlaw_orchards

Photo contributed by Laura Kelly.

Before heading into the orchard, visit the sample wagon to taste the fruit that is ready for picking. Spencer taught me the nuanced differences in taste when comparing apples to apples.
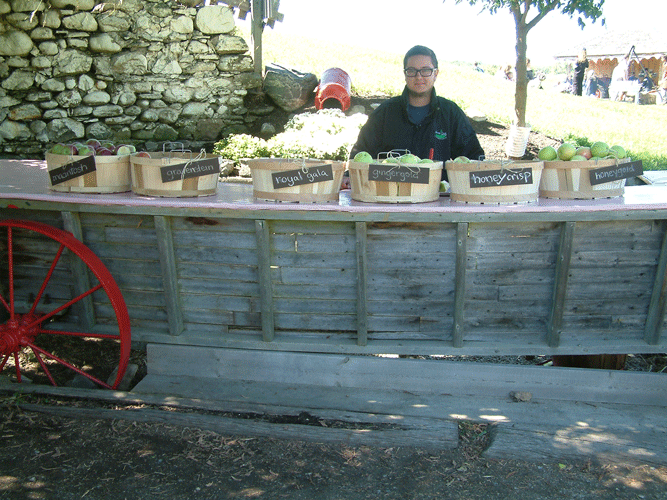
carl_laidlaw_orchards Here’s where you will learn what apples are best for the school lunch-box (something small enough to finish in a hurry, like Royal Gala) and which apples are best for eating out-of-hand or for cooking (which varies depending on how you are cooking them). Once you are armed with that knowledge, take a wagon ride out into the orchard – the driver will show you which trees are ready for picking your favourites. I chose Gravenstein apples for my pies because they hold their shape well. I love Ginger Gold for eating out-of-hand; crisp, light, sweet yet mildly tart, this apple has the added bonus of browning less quickly than other apples.

I want to visit the orchard often this fall; as the season progresses other varieties will be become available. You can visit the farm’s website for a comprehensive list of the varieties grown at Carl Laidlaw Orchards and when they expect each variety to be ready; plus there are some handy tips on how to best store your fruit at home.

But a trip to Carl Laidlaw Orchards is about much more than picking apples. It’s an opportunity to have some old-fashioned family fun in an absolutely charming vintage country farm setting.

carl_laidlaw_orchards

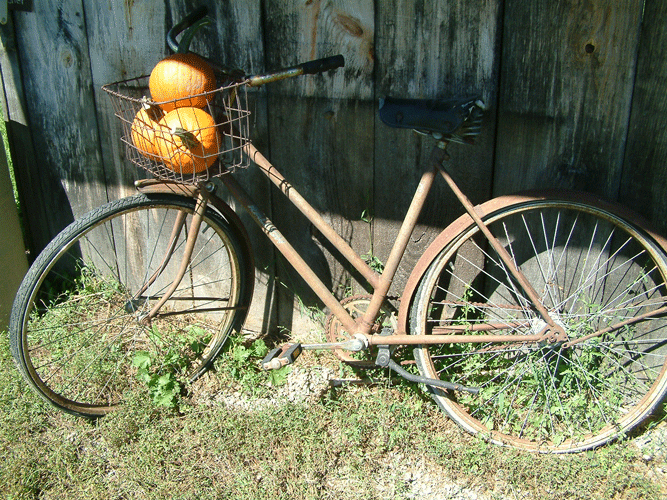
There a plenty of whimsical surprises throughout the farm evoking happy recollections of simpler times.
DSCF0018

Evidence of Laura’s nostalgic creativity pop up all around the farm, from the scarecrows dressed in retro fashions…

carl_laidlaw_orchards

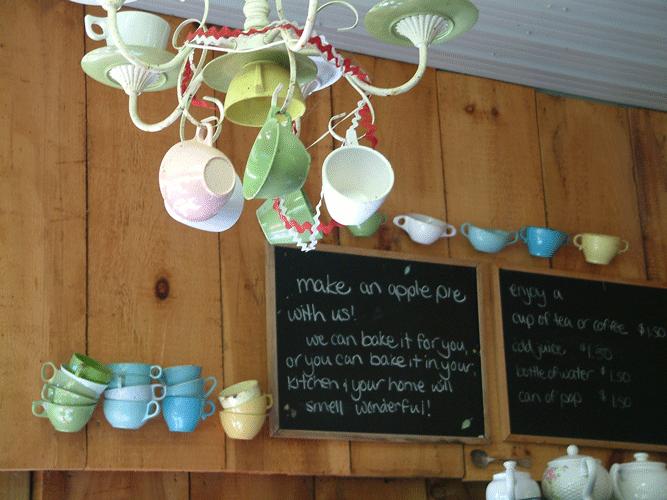
…to darling teacup chandeliers crafted by Laura…
carl_laidlaw_orchards

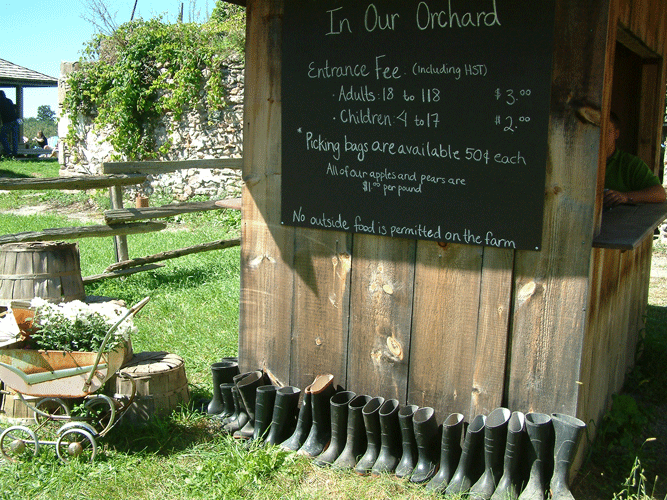
…to old doll carriages filled with fall flowers. Every corner is a still-life photograph.
carl_laidlaw_orchards

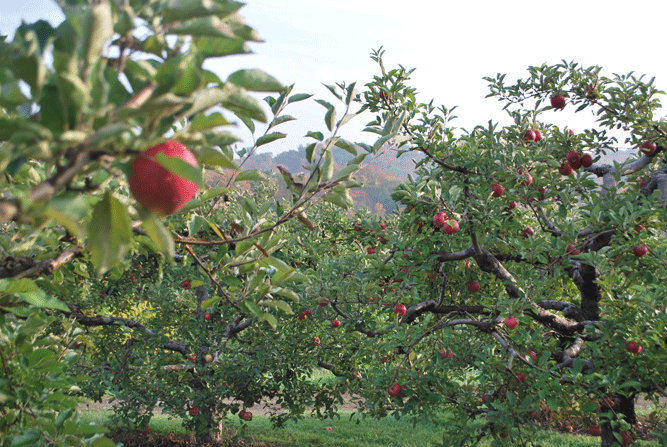
A visit to Carl Laidlaw Orchards has always been a well-loved family tradition for us on Thanksgiving weekend. We gather our clan and head to the farm to load up our car with sweet crisp apples. We stroll through the orchards, while enjoying the fresh air and the vista of trees dotted with ruby red apples, set against a backdrop of blue skies and fall colours.
carl_laidlaw_orchards

Photo contributed by Laura Kelly.

Kids love riding in the wagon, jumping in the hay barn, playing with the toy trucks in the granary, and tumbling in the corn-kernel-filled gazebo.

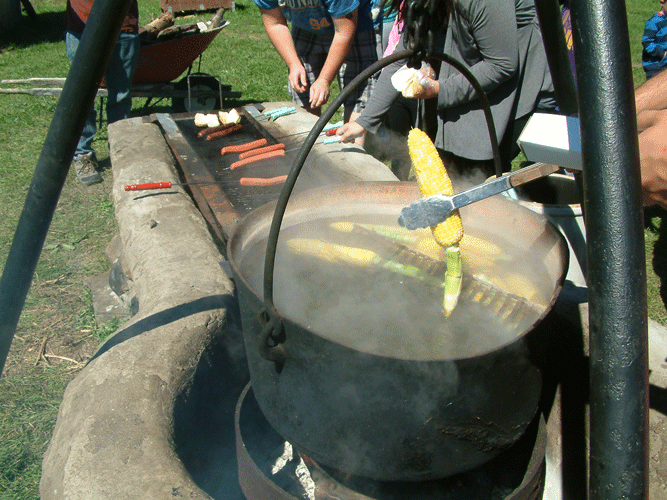
On weekends, you can roast your own hot dog or sausage (and garnish it with a variety of gourmet toppings) or indulge in a cob of sweet, tender corn dipped in buttery goodness. Olive that part too!
carl_laidlaw_orchards

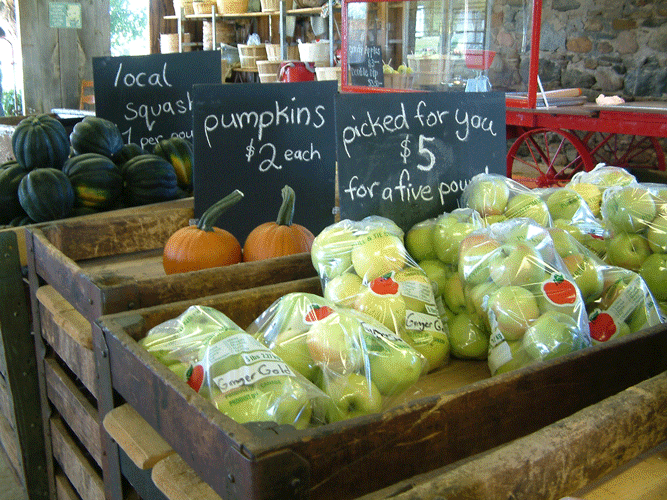
The quaint barn market offers the already-picked, fresh bounty of Carl Laidlaw Orchards, as well as local produce brought in from other nearby farms, such as squash and garlic from Sunny Acres Farm.
carl_laidlaw_orchards

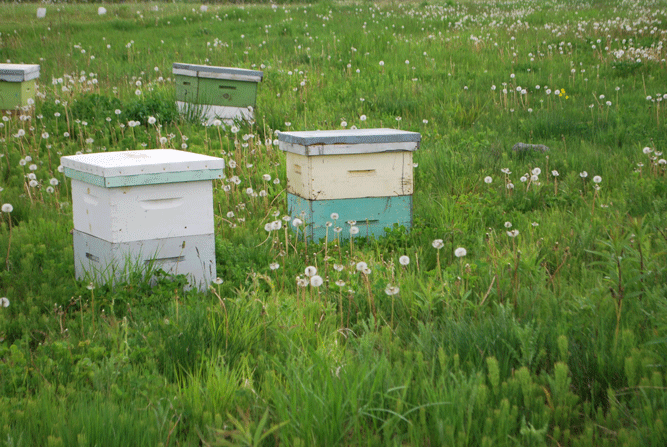
The Laidlaws also sell Ontario honey but in the next few weeks, something extra sweet is in store for their guests – honey from the Laidlaw’s very own hives!
carl_laidlaw_orchards

Photo contributed by Laura Kelly

Jams and preserves are made by Mark’s cousins. Often, Laura dreams up the prettiest hue of blue to dip her candy apples in. She also makes caramel apples and traditional red candy apples. Oh to be a kid again!

Gorgeous handmade flatbread pizzas from Blossom Bakery will be available at the farm again this year: on Fridays, Saturdays and Sundays. They are hand-crafted – using gourmet cheese and fresh toppings – by Laura’s friend Jackie, on her family farm in Jordan, Ontario.

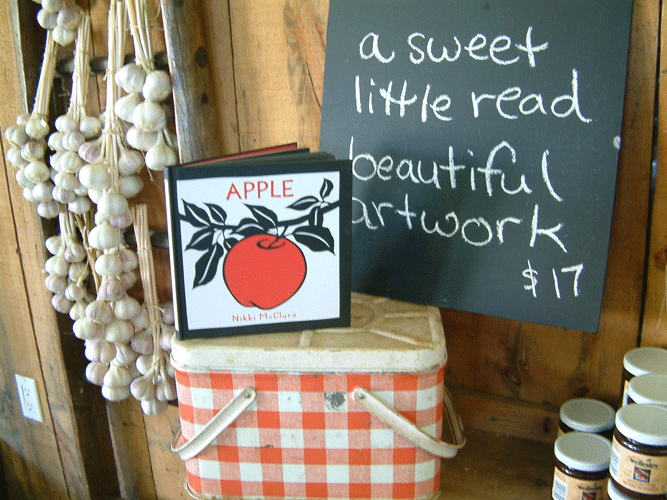
This year, Laura brought in a book made by artist Nikki McClure; all of the artwork was done with an xacto knife, using a single piece of paper. Laura is also excited about a kids’ temporary tattoo that she asked a children’s book illustrator to design; they are meant to be a little thank you for farm guests. They will be available starting September 16th, while supplies last.
carl_laidlaw_orchards

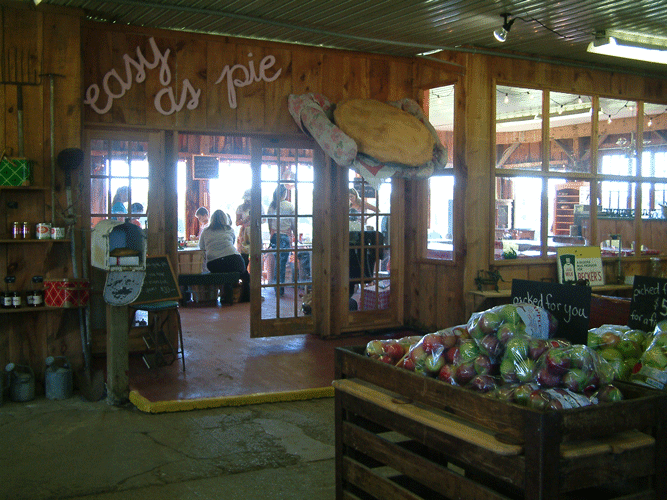
The aroma of freshly baked, cinnamon-scented apple pie will draw you into the pie-making room, aptly named “Easy as Pie” – a big hit with kids and novice bakers.
carl_laidlaw_orchards

Under the watchful eye of their parents, kids can use an old-fashion apple peeler to peel their own apples, load them in a pre-made crust, sprinkle on some cinnamon sugar, seal the top crust, and adorn it with their very own proud initial.
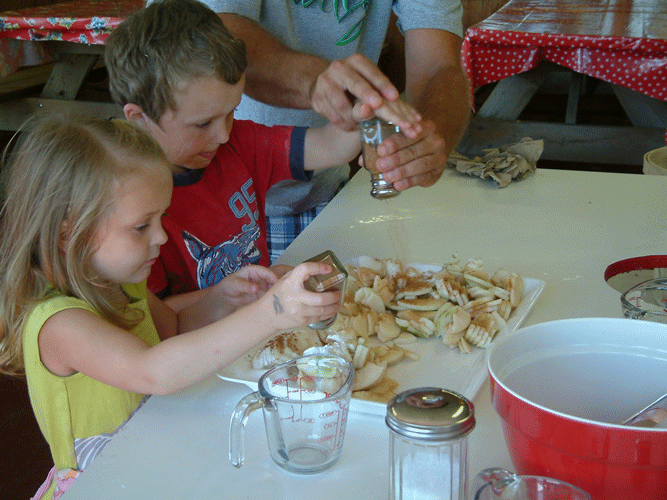
carl_laidlaw_orchards

It’s a sweet memory for parents to keep tucked in their hearts. Kids grow up in the blink of an eye – remember to slow down and smell the apple pie!
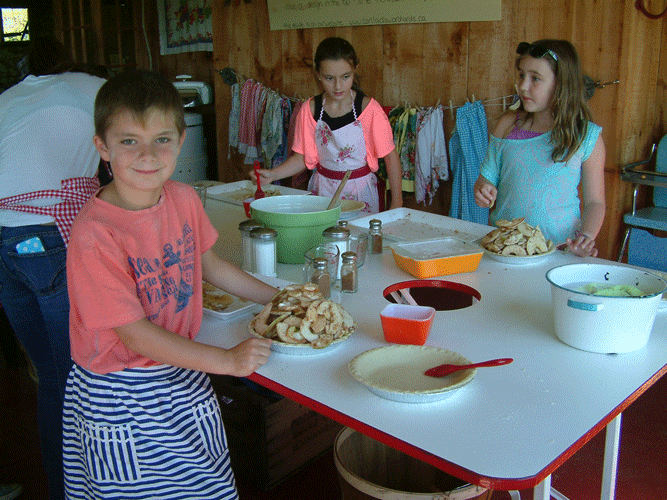
carl_laidlaw_orchards

I have shared many special moments with my own son on this beautiful farm, laughing under the apple boughs, delighting in a big, crunchy bite of a juicy apple picked fresh from the tree, jumping for glee in the hay barn, and making pie together.

I wish I could pluck up every kid and plop them for a few moments here – give them the chance to experience what being a kid should be all about.

Carl Laidlaw Orchards is just a short drive from Streetsville. On the way you will notice our urban sprawl encroaching further and further on precious farm land. Thank you, Carl Laidlaw Orchards, for working so hard to share your lovely farm with all of us.
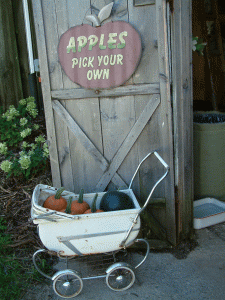
DSCF0048 carl_laidlaw_orchards

Please click here for information you should know before visiting the orchard.  If you scroll down a little further in this post, you will find some of Laura’s delicious recipes using freshly picked apples from Carl Laidlaw Orchards.

Carl Laidlaw Orchards
9496 Heritage Road
Brampton, Ontario
L6X 0A1
 
Telephone: 905-456-2095

Open: daily from 9:00 a.m. to 5:00 p.m. during September and October, possibly into November depending on Mother Nature.

www.carllaidlaworchards.com


View Larger Map

Blossom Bakery is a small wholesale bakery located on a family fruit farm in Jordan Station, Ontario. Everything is homemade from scratch using local Niagara produce, when possible. Blossom Bakery also sells veggie tarts, fresh fruit salsas, and a variety of baked goods.

You can find Blossom Bakery’s artisanal flatbread pizzas during the summer at Burlington’s Centro Farmers’ Market and in the fall at Carl Laidlaw Orchards. In Hamilton, you can find their products at Punchbowl Market and the Cheese Shoppe on Locke. In Niagara you will find them in farm stands, gourmet shops, and farmers markets, including the Wednesday night Supper Market in Niagara-on-the-Lake. Also available at the Grimsby Market.

Blossom Bakery
Jackie Troup
2323 Honsberger Avenue
Jordan, Ontario
Telephone: 905-562-0108
 

Laura’s family has been dear to my heart since I became fast forever friends with her sister, Cathy, in grade school.  When you are a good friend of one of the Kelly family, you are a friend of all. From Beryl’s traditional Christmas Eve Oysters Rockefeller to Cathy’s Phyllo Orange Chicken, they have nurtured my soul.
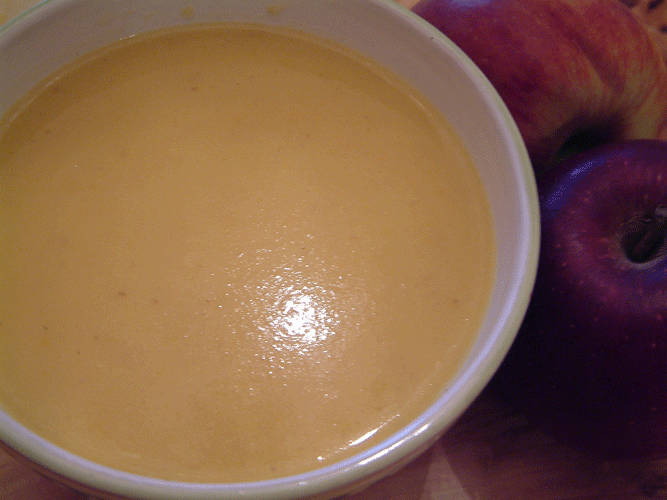
apple_squash_soup

Laura’s Farmhouse-Fusion Apple Squash Soup

Serves 4

One December afternoon when my son was a wee boy and the farm had closed for the season, Laura entertained us in the barn which she decorated for Christmas with a darling teacup and sugar cube garland she had made. We made a pie, strung popcorn, cut paper snowflakes, and gazed out through the snowflakes falling softly in the waning December light to try to catch a glimpse of deer grazing by the river. My son roasted a hot dog in the belly of the old wood stove and Laura served me a bowl of this delicious soup – a velvety-smooth squash soup, sweetened by apples and accented with gentle undertones of curry and creamy coconut. Laura describes it as both exotic and familiar. I say it’s proof of her exceptional gourmet talents.  This is at the top of the list of my favourite soup recipes.

Ingredients:

1 tablespoon butter

1 yellow cooking onion, finely chopped

4 apples, peeled, cored, and diced

1 ½ teaspoons ground cumin

½ teaspoon ground coriander

½ teaspoon ground ginger

¼ teaspoon green curry paste

3 cups cubed buttercup (kobacha) squash (from about a 2 lb whole squash)

2 cups water

2 cups chicken stock

1 cup canned coconut milk, well-shaken

salt to taste

Optional garnish: coriander springs and lime wedges

Directions:

  1. In a large saucepan, heat butter over medium low-heat and sauté onion and apples until soft, about 15 minutes.
  2. Add all of the spices; sauté for two minutes, stirring frequently.
  3. Add squash, water and chicken stock; bring to a boil, reduce heat to medium-low and simmer, stirring occasionally until squash is tender, about 25 minutes.
  4. Remove from heat and let cool slightly. Transfer to a blender or food processor; purée until smooth. Return to pan; stir in coconut milk and heat gently. Taste and add salt, if necessary.


Nancy’s Fall Fair No-Fail Pastry

Makes enough pastry for 2 pies.

Laura’s sister, Nancy, won a ribbon at a fair for this pie crust. Laura says it’s a no-fail recipe – and she would know since she bakes lots of pies. I have never had luck at rolled pie crust recipes – until now. Well, roll me out and win me over – this pie crust has turned an apprehensive pastry maker into an accomplished apple pie baker! Thank you Nancy!!

Lard makes the pie crust flaky from top crust to bottom crust – no more soggy bottoms…I hate soggy pie bottoms! I don’t eat pie often so a little lard once in a harvest moon is okay with me.

Ingredients:

5 cups all-purpose flour

4 tablespoons brown sugar, lightly packed

½ teaspoon baking soda

dash of table salt

1 pound lard

1 large egg

1 tablespoon white vinegar

water

Directions:

  1. Combine the flour, sugar, baking soda, and salt in a large bowl.
  2. Using a pastry blender or two knives, cut the lard into flour mixture only until it looks like coarse oatmeal with a few larger pieces.
  3. Crack the egg into a 1-cup measuring cup; beat, then add water to make ¾ cup. Add the vinegar; stir well.
  4. Using a fork, gradually stir egg mixture into flour mixture; then knead a little. Gently gather dough up and divide into four equal balls (two tops and two bottoms); flatten slightly to form disks and wrap in plastic wrap. Chill for at least 1 hour before rolling out for pie.


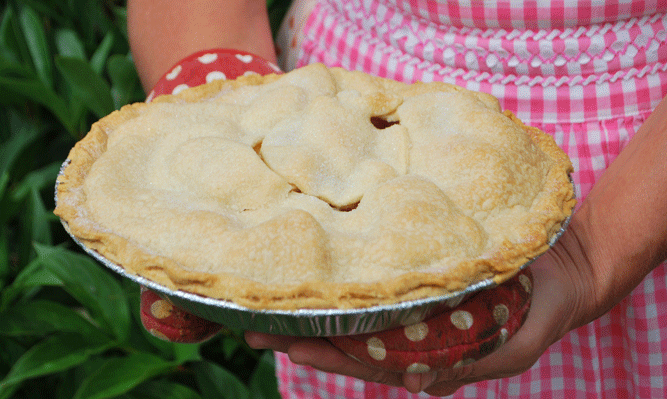
Mark’s Apple Orchard Pie

Makes 1 pie.

This is Mark and Laura’s apple pie recipe. According to Laura, Mark still asks for apple pie instead of birthday cake and he still eats pie for breakfast. Bake this delicious pie for the apple of your eye and fill your kitchen with the heavenly scent of apples and cinnamon. Serve warm with cinnamon whipped cream, vanilla ice cream, or a slice of old cheddar cheese.

Decide on whether you like a filling of apple slices that  hold their shape or one that is softer, and then ask a farmer what available apple is most suitable.

Ingredients:

2 disks of Nancy’s Fall Fair No-Fail Pastry, well-chilled

5 large apples (Mutsu, Golden Delicious, Ida Red) or 7 medium apples (Cortland, Gravenstein, Spartan, McIntosh)

1 tablespoon fresh lemon juice

¼ cup brown sugar, lightly packed

1 teaspoon ground cinnamon

¼ teaspoon ground nutmeg

2 tablespoons flour

Directions:

  1. Preheat oven to 450°F. Place a cookie sheet in the middle of your oven.
  2. Roll out one of the chilled disks between 2 sheets of waxed paper to 1/8” thickness, forming a circle. Carefully transfer rolled dough to a 9” tin pie plate (remove the paper); gently line the pie plate with the rolled dough, then place pie plate in the fridge.
  3. Roll out the second disk to the same thickness, forming a circle. Place in the fridge.
  4. Place the lemon juice, sugar, and spices, in a large bowl; whisk.
  5. Peel, core and thinly slice the apples, adding them to the bowl of spices and tossing occasionally to prevent browning. Add the flour; toss well.
  6. Tip the mixture into the prepared pie shell. Top with remaining pastry, trim and crimp edges together. Cut a few slices in the top to let the steam escape.
  7. Place the pie on the cookie sheet; bake for 10 minutes, then immediately reduce the temperature to 350°F and bake for another 40 to 50 minutes, until the pastry is golden brown.
carl_laidlaw_orchards

Photo contributed by Laura Kelly.

 
Read More

Latin Love Affair: Olive’s Shrimp Tacos

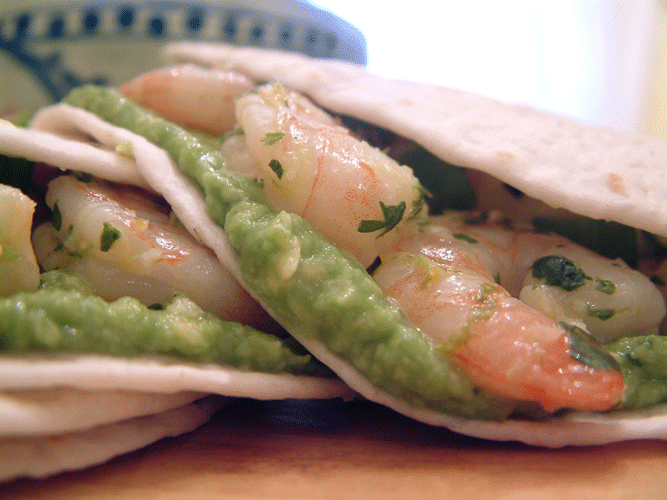
Move over beef tacos, there’s a new dish in town. My Shrimp Tacos are easy, healthy, and packed with refreshing flavour. Succulent pre-cooked shrimp are briefly marinated in cilantro, mint, lime, garlic, aji amarillo paste, sugar, and salt – a mouthwatering melody of sweet, sour, spicy, and salty. Served in a soft tortilla spread with avocado purée and a lick of lime juice, they are everything I want in a shrimp taco. My son named them his new favourite food. Olive to make my son happy!

shrimp_tacos

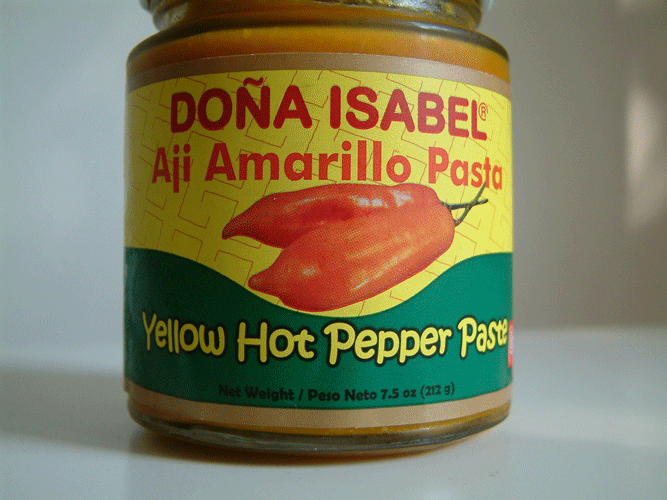
Aji amarillo paste is a simple blend of orange-fleshed, medium-hot Peruvian chili peppers, which are prized for their unique fruitiness. Aji means chili pepper and amarillo means yellow. Although very common in Peruvian cooking, aji amarillo peppers can be hard to find here. I was thrilled to find aji amarillo paste (sold in jars)

aji_amarillo_paste

and the much sought-after, frozen, whole aji amarillo peppers (imported from Peru) in Latin Super Chicken Rotisserie – a little Latin American grocery store that also sells Peruvian-style rotisserie chicken, located at the corner of Queen and Britannia, in Streetsville. I confirmed by phone that the stores Rincon de Espana in Port Credit and El Tropical in Oakville also carry aji amarillo paste.

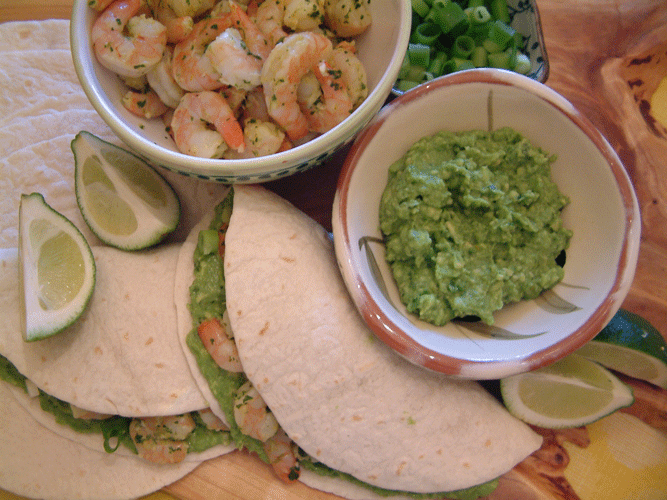
shrimp_tacos

Olive’s Shrimp Tacos

Serves 3 to 4

If you can’t find aji amarillo paste, Tabasco sauce is an adequate substitute for this recipe.

Marinade Ingredients:

1 lime

1 tablespoon roughly chopped fresh mint leaves

1/3 cup roughly chopped fresh cilantro leaves

1 large clove of garlic

1 teaspoon aji amarillo paste (Peruvian yellow hot pepper paste)

½ teaspoon salt

½ teaspoon white sugar

1 tablespoon olive oil

Taco Ingredients:

454 g (1 lb.) frozen cooked, peeled shrimp 61/70

1 avocado

2 green onions, finely sliced

8 medium soft flour tortillas

1 lime, quartered

Optional garnish:

Extra coriander sprigs

Directions:

  1. Defrost shrimp according to package directions; drain. Remove tail shells and discard. Place shrimp in a paper-towel-lined bowl, cover and chill in the fridge for at least 1 hour to drain well.
  2. Meanwhile, grate the lime zest into the bowl of a small food processor. Juice the lime and add to the zest; add remaining marinade ingredients and then process until well-blended.
  3. Pour out 1 tablespoon of marinade and set aside in fridge for later use with the avocado. Pour remaining marinade in a large, re-sealable Ziploc bag and seal. Refrigerate until 1 hour before eating.
  4. One hour before eating, place shrimp in marinade bag. Squeeze out the air and seal tightly. Massage the marinade into the shrimp until evenly coated. Place in the fridge and marinade for 1 hour.
  5. Just before serving, warm tortillas in the oven as per package instructions.
  6. Meanwhile, cut the avocado in half and remove the pit. Scoop the flesh into a medium bowl. Using a fork, mash the avocado into a purée. Add the remaining 1 tablespoon reserved marinade and stir thoroughly. Spread ⅛th of the avocado puree on one half of each tortilla.
  7. Dump marinated shrimp into a colander set in the sink and drain briefly. Place about ⅛th of the shrimp on top of the avocado puree. Sprinkle with green onions and fresh coriander sprig, if desired. Fold other half of tortilla over.
  8. Serve with immediately with lime wedges.

You can find aji amarillo paste at:

Latin Super Chicken Rotisserie
17 Queen Street North A5,
Mississauga, ON
L5N 6A1
Telephone: 905-369-0420
Open Tuesdays to Saturdays from  11:00 a.m. to 8:00 p.m. & Sundays from 12:30 p.m. to 6:00 p.m.


El Tropical
391 Kerr Street,
Oakville, ON
L6K 3B9
Telephone: 905-845-9262

Rincon De Espana Inc.
550 Lakeshore Road East
Mississauga, ON
L5G 1J3
Telephone: 905-274-2109

Read More
Backyard Ribfest: Olive’s Kansas City-style Barbeque Ribs

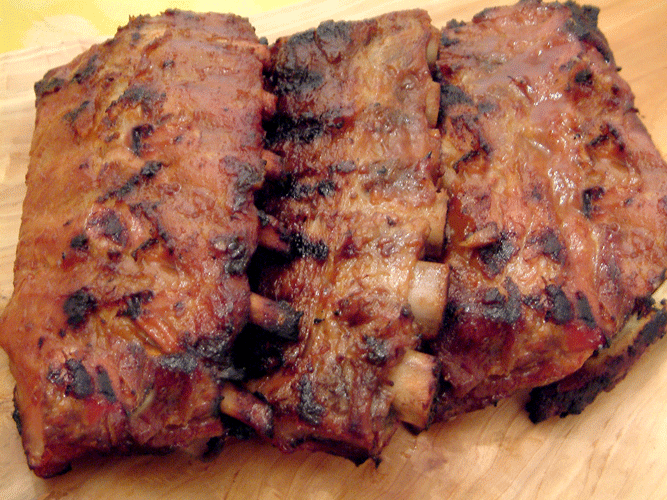
If you can’t make it out to Canada’s Largest Ribfest this weekend (August 30th to September 2nd in Burlington’s Spencer Smith Park), here’s a recipe you can enjoy in your own backyard. Sure to put the smile back on any last-day-of-summer sad face, my Kansas City-style Barbeque Ribs are a great way to end summer vacation.

There are a few easy steps involved but most of the work is done ahead of time, making these ribs perfect for special occasions. My ribs are steam-baked in homemade barbeque sauce and a slow oven the day before, chilled in the fridge overnight, and then finished on the grill for 15 minutes to impart a smoky flavour and a caramelized crust. The end result: tender ribs in a lip-smackin’, finger-lickin’ homemade sauce that is dead-on delicious. And you don’t have to worry about a grill for hours.

My barbeque sauce recipe is Kansas City-style: tangy, sweet and a bit spicy – just the way olive it! Make the barbeque sauce at least one day ahead – the flavours deepen overnight. I make a big batch and freeze it in smaller portions. The acidity of the vinegar in the sauce will be mellowed by the richness of the meat – both setting each other off perfectly, I think – so don’t judge the sauce until you taste it on the finished ribs.

kansas_city_bbq_ribs

Olive’s Big Batch Kansas City-style Barbeque Sauce

Makes about 7 ½ cups

Delicious on ribs or chicken. Make one day in advance.

Ingredients:

2 tablespoons butter or vegetable oil

4 cloves garlic, finely minced

1 cup water

3 cups tomato ketchup

1 cup apple cider vinegar

⅔ cup Worcestershire sauce

½ cup prepared yellow mustard

1 cup brown sugar, lightly packed

1 cup honey

½ cup hoisin sauce

2 teaspoons hot pepper sauce (Tabasco)

2 teaspoons salt

Directions:

  1. In a large heavy saucepan, melt butter over medium-low heat; add garlic and sauté, stirring constantly, for 1 minute.
  2. Remove the pan from the heat, so the garlic doesn’t burn; add the remaining ingredients to the pot and stir thoroughly with a whisk.
  3. Set the pot back over medium heat and bring to a boil, stirring frequently; immediately reduce heat to medium-low and simmer for 45 minutes, stirring occasionally with a wooden spoon.
  4. Store overnight in the refrigerator to allow the flavours to deepen, or freeze for longer storage. Freeze in 2 cup portions. One 2-cup portion is enough for 2 racks of ribs.

The method I use to cook the ribs (that I learned from a Trish Magwood Party Dish recipe – Sticky Barbeque Ribs) infuses the meat with barbeque sauce. The key is to seal the ribs very tightly in foil and then slow roast them in the oven for two hours until they are fully cooked – you will be rewarded with tender ribs that just need finishing on the grill.

Another key to success is to chill the ribs to firm the meat before grilling them – so after I bake my ribs in the oven, I chill them in the fridge overnight and then put them on the grill cold (straight from the fridge) to finish them. I learned this tip from a cooking show long ago; it has always worked, I didn’t ask why….but then I thought my readers deserved to know the science behind it. So, I went to The Food Lab and asked part-scientist/part-chef Kenji López-Alt (Chief Creative Officer, Serious Eats) for his expert opinion and am grateful to have received his prompt answer which he has allowed me to share with you:

“…chilling increases the viscosity of internal juices which makes them a little firmer so they don’t fall apart. It also lets you char the exterior without drying them out.”

Kenji Lopez-Alt’s weekly column The Food Lab on Seriouseats.com explores the science of home cooking. Click here to read his column, follow him on Twitter or Facebook or send him an e-mail. Thank you Mr. López-Alt!

Ribs should be cooked until they come cleanly off the bone when you bite in but are not falling off the bone when you pick them up to eat them. If you follow my recipe, that’s how your ribs will turn out.

Olive’s Kansas City-style Barbeque Ribs

Serves 4 (half rack portions)

A great make-ahead dish for a summer barbeque party. Prepare these ribs one day prior to grilling them.

Ingredients:

2 racks baby back pork ribs (back membrane removed – ask your butcher or do yourself)

2 cups Olive’s Big Batch Kansas City-style Barbeque Sauce

4 17”-square pieces of heavy-duty aluminum foil

Directions:

  1. Preheat oven to 275ºF. Cut each rib rack in half.
  2. Measure ½ cup of barbeque sauce into a separate container to brush on the raw ribs; do not contaminate the remaining barbeque sauce – refrigerate it for basting the pre-baked ribs on the grill and for serving on the table the next day.
  3. Brush both sides of the ribs with the ½ cup of barbeque sauce, dividing it evenly among the 4 sections.
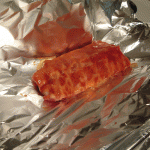
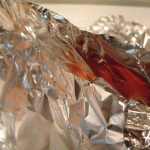
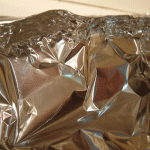
  4. See instructional photos below. Place one rib section, meaty side up, on the centre of each piece of foil. Fold the sides of the foil up towards the ceiling. Leaving an air pocket on top of the ribs, bring the foil edges together at the top and fold down about ¾”; crimp tightly all along the edge with your fingers to make an airtight package; fold down two more times the same way. Repeat the same process to seal both ends of the packet. Take care not to puncture the foil during this process.
  5. Carefully transfer wrapped ribs to a rimmed baking sheet; place tray on the middle oven rack of a 275ºF degree oven; bake for 2 hours.
  6. After 2 hours, remove ribs from the oven but don’t open the packets; let cool, sealed in their packets, at room temperature for 15 minutes.
  7. Carefully open hot foil packets. Remove ribs from foil and place in a baking dish; discard remaining juices and foil. Cover dish with plastic wrap. Chill ribs in the fridge overnight. Do not remove from the fridge until you are ready to grill – the meat should be chilled thoroughly when you put the ribs on the grill.
  8. When ready to serve the next day, preheat grill to medium heat. Remove the cold ribs from the baking dish and place the ribs directly on a clean, well-oiled grill; immediately baste with barbeque sauce and grill for 5 minutes. Flip and baste again with barbeque sauce; grill for another 5 minutes. Flip and baste with sauce two more times, grilling for about 5 more minutes or until sauce is caramelized, lightly charred, and the meat is hot.  In total, you should have basted 4 times total and grilled for about 15 minutes or so.
  9. Serve remaining ½ cup sauce in a bowl on the table for those who want to brush more sauce on their ribs.
bbq_ribs

Step 1

 
bbq_ribs

Step 2

 
bbq_ribs

Step 3

 
bbq_ribs

Step 4


18th Annual Canada’s Largest Ribfest
Organized by the Rotary Club of Burlington Lakeshore.
Location: Spencer Smith Park in Burlington, Ontario
Dates: August 30th to September 2nd, 2013 
Hours: 11 am to 11 pm Friday, Saturday and Sunday, 11am to 8 pm Monday
All the info you need to know is here: www.canadaslargestribfest.com
Read More
Three Wishes: Tea in the Garden with Christine

I shared a spot of tea with my friend Christine recently, whose amiable British charm instantly wins over everyone. With the birth of several royal babies in my extended family (and oh yes, in the Royal Family too), we had a lot to talk about. Like a couple of birds, we perched ourselves in her enchanting backyard garden cottage.

Three Wishes Cottage

Her garden cottage is so pretty and so tiny, it’s the perfect spot for a cup of tea or a midsummer night’s dream.

Three Wishes Tea in the Cottage

Three Wishes Loft

Her cottage is as dreamy as her delightful shop, Three Wishes, which Christine fills to the brim with the prettiest one-of-a-kind finds for home and garden.

Three_Wishes_Shop

I love Christine’s collection of shabby chic and antique furniture and accessories, all white and whimsical.

Three_Wishes_Garden_Set

Look at this door that Christine turned into a chalkboard. The petticoat chandelier on the left would be darling in a little girl’s room.

Three_Wishes_Chalkboard

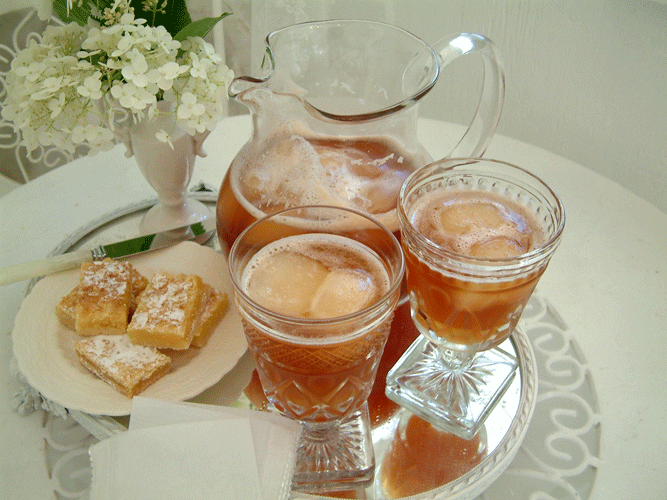
In celebration of the royal babies, Christine and I enjoyed Ginger Tea Punch. My best friend’s mom, Mary, first served it to me at the baby shower she and her daughter hosted to celebrate the birth of my son. Olive it so much, it is now the only punch recipe I keep in my recipe files. It is light and refreshing and not too sweet, unlike most punches. Mary and her daughter are both talented cooks and lifelong friends. Mary and my mom shared a room in the hospital where Mary’s daughter and I were born, three days apart. We’ve been best friends ever since.

Ginger_Tea_Punch

Mary’s Ginger Tea Punch

Makes about 12 cups

A light and refreshing punch. This recipe makes enough for a party. You can easily cut the recipe in half  but I am unable to find 1L ginger ale bottles. Be sure to make the lemonade ice cubes or ice ring (if you are serving it in a punch bowl). When the ice melts, it adds to the flavour of the punch.  The ice ring will stay frozen longer than the cubes.

Ingredients:

4 cups water

6 tablespoons white granulated sugar

1 teaspoon ground ginger

8 tea bags

1 2L bottle ginger ale, well-chilled

Lemonade to make lemonade ice cubes or ice ring

Directions:

  1. The day before serving, pour lemonade into desired shaped mold (ice cube tray or Bundt pan) and freeze overnight, until ready to serve punch.
  2. Several hours before serving, bring the water, sugar, and ground ginger to a rolling boil. Stir with a whisk. Add the teabags (do not stir), remove from heat, and steep for eight minutes. Gently remove teabags (without squeezing them) and refrigerate brewed tea until well chilled.
  3. Just before serving, place brewed tea and ginger ale in a large container such as a punch bowl. Stir. Add lemonade ice. Serve immediately.

Here are my three wishes for you:

1) A few free moments to yourself to enjoy these beautiful, fleeting summer days.

2) A dreamy, enchanted space to steal away to (drop by Christine’s shop for some inspiration and a lovely chat).

3) Good friends, old and new, to treasure for a lifetime.

‘The best of British to you’ (good luck)!

Love,

Olive

Three Wishes

11 Barry Avenue
Streetsville, ON
L5M 1Z6
 
Telephone: 416-575-9950
 
Hours:
Thursday from 4:00 p.m. to 8:00 p.m.
Friday from 10:00 a.m. to 2:00 p.m.
Saturday from 10:00 a.m. to 2:00 p.m.


View Larger Map

Read More