


Here are some quick ideas for easy breezy assembly-only appetizers to download to your dock or deck this summer. Gather some fresh and seasonal ingredients, make a few simple slices, and then assemble into beautiful and delicious appetizers that will leave you with more time to spend with your happy guests. Who wants to be in the kitchen when you can be down on the dock?
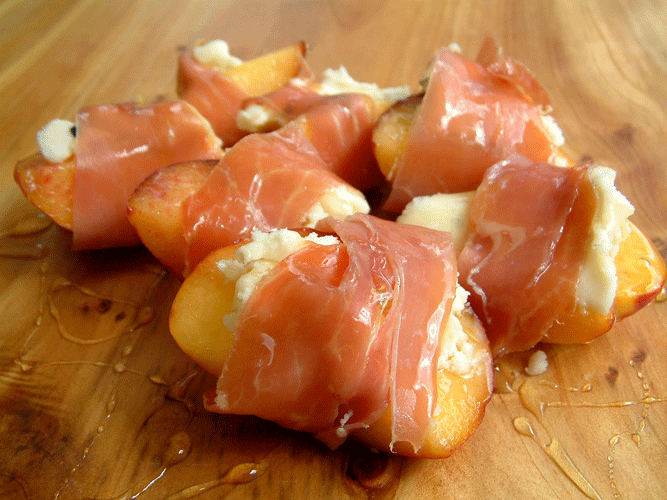
Spanish Twist: Peaches with Serrano Ham, Creamy Blue, & Honey
Wow your guests with a little Spanish flare: Spanish-style serrano ham, creamy blue cheese, and honey compliment juicy peaches, beautifully. Spanish food is hot in Toronto right now. Bring a little Barcelona to your own backyard.
Ingredients:
Peaches – pick out some fragrant, ripe Ontario-grown beauties.
Mild, creamy blue cheese – my favourite is Devil’s Rock Creamy Blue Cheese. The sharpness of this milder blue is softened by the creamy, rich texture of the cheese.
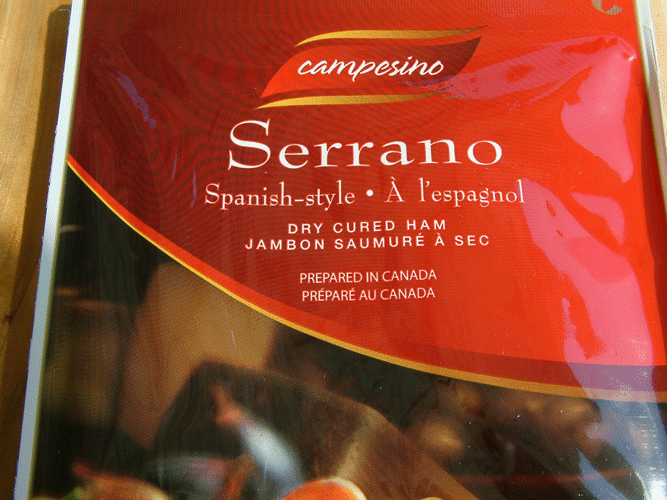
Serrano ham – Spanish-style dry-cured ham (similar to prosciutto). I use the Campesino brand.
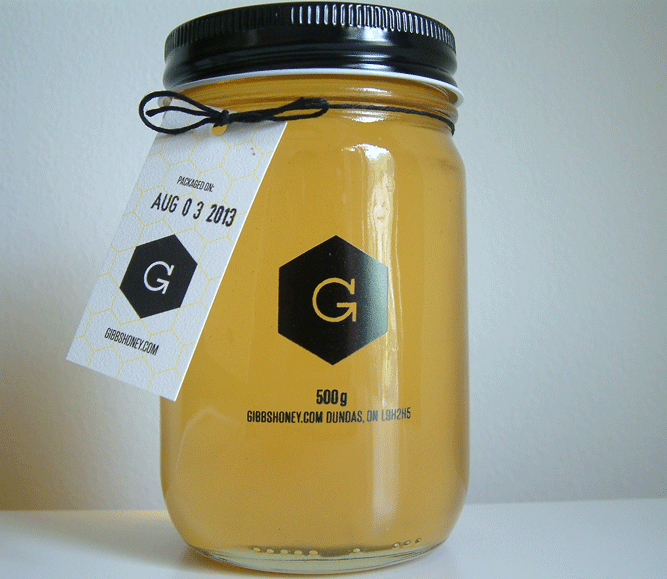
Honey – use your best honey. Try some wonderful, locally produced wildflower honey such as Gibbs. Gibbs bees live the good life, on a former Christmas tree farm (in Canfield, Ontario), surrounded by mixed pines, wildflowers, clover, pastures, and hay fields.
Directions:
- Let the blue cheese come to room temperature to be easier to spread. The serrano ham should also be served at room temperature. Cut the ham into strips narrower than the width of the peach (so both ends of the peach will show through when you wrap it around) and long enough to wrap around the slice at least 1 ½ times.
- Just before serving, slice the peaches into wedges. Smear a touch of blue cheese on each slice. Wrap with serrano ham. Drizzle with plenty of good honey. Serve immediately.
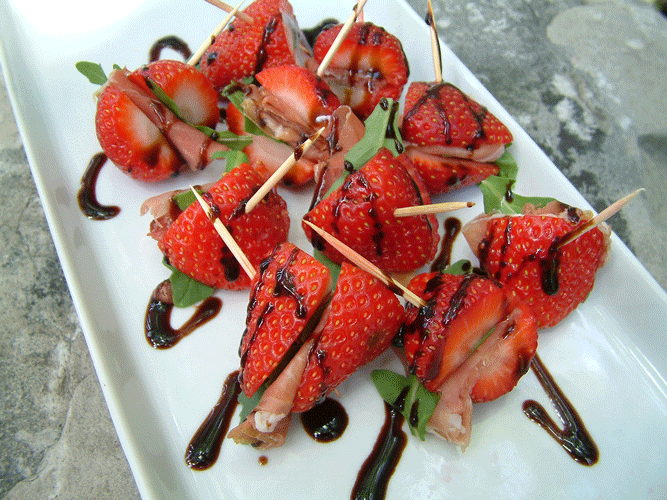
Balsamic-Drizzled Strawberries Stuffed with Prosciutto & Arugula
My friend attended an evening at a friend’s cottage on Prince Edward Island and came back with this delicious and different approach to the old standby of melon and prosciutto. The arugula adds a slight peppery punch that pairs well with the sweet tartness of the strawberries and balsamic glaze. The prosciutto brings in a touch of salt, leaving a wonderfully balanced combination of flavours in your mouth.
Ingredients:
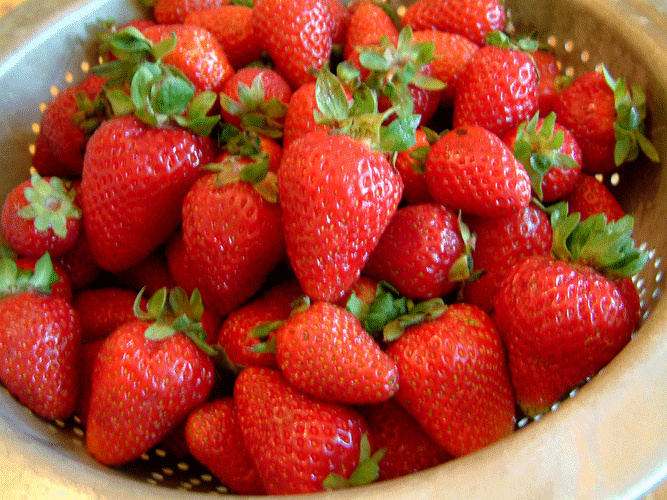
Strawberries – locally grown and sweet. Strawberries in August? Well yes, if you buy local berries grown on ever-bearing plants that produce wonderful fruit right up until frost.
Prosciutto – buy the best you can find. I use Longo’s Prosciutto di Parma (ask for it at their deli counter).
Arugula – try to find baby arugula. Longo’s Organic Baby Arugula is tiny and perfect.
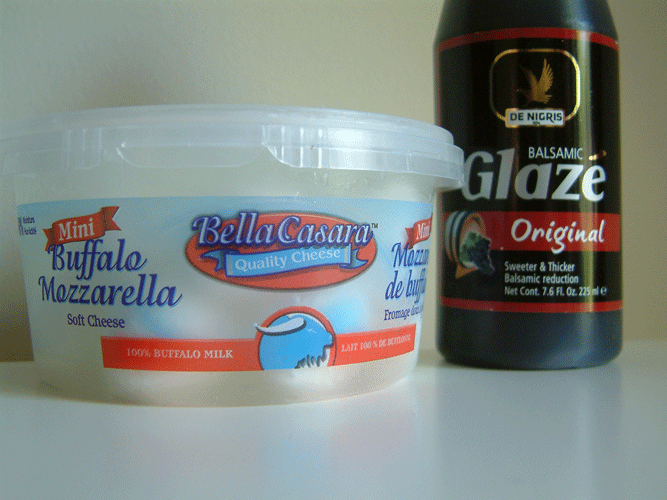
Balsamic glaze – I use De Nigris Balsamic Glaze. Don’t bother making your own. This glaze is priced right, keeps well, and best of all, comes in a squeezable bottle so you can add some drama to your drizzle.
Toothpicks
Directions:
- Slice the top off the strawberries to remove the hull and leave a clean cut.
- Cut a small piece of prosciutto (big enough that you can fold it over once or twice and fit it nicely inside the strawberry); place the prosciutto on the cut side of one strawberry half.
- Place a small leaf of arugula (folded if necessary but you want a little green sticking out) on top of the prosciutto.
- Place the other strawberry half on top; secure both halves with a toothpick. Place on a serving platter and drizzle a generous amount of balsamic glaze over top in an artful but haphazard pattern. Serve immediately.
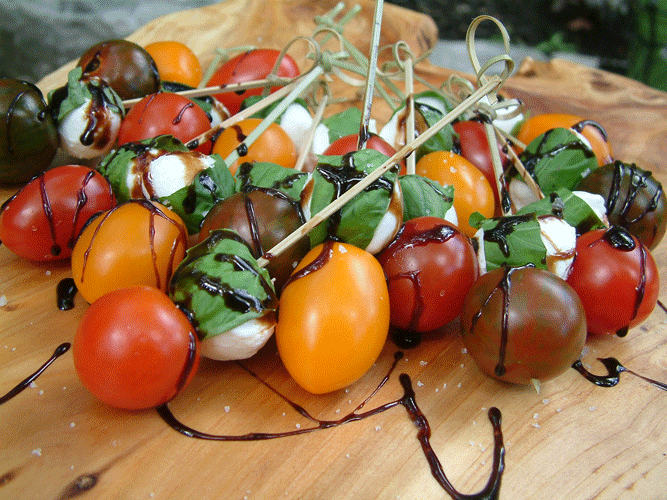
Tomato Bocconcini Basil Skewers
When local tomatoes are in season, you can’t beat this colourful summer classic of juicy tomatoes, soft mini buffalo mozzarella cheese balls, the lovely licorice note of fragrant basil, a generous drizzle of balsamic glaze, and a sprinkling of crunchy sea salt.
Ingredients:
Cherry tomatoes – choose the ripest, most colourful, locally grown cherry tomatoes you can find. And for heaven’s sake, please don’t store them in your fridge.
Fresh basil leaves – hope you are lucky enough to have some growing in your garden!
Mini buffalo mozzarella cheese balls – top quality is crucial here. Bella Casara Mini Buffalo Mozzarella Soft Cheese is made from 100% buffalo milk. It’s locally produced in Vaughan, Ontario by family-run Quality Cheese Inc.
Balsamic glaze – I use De Nigris Balsamic Glaze. Don’t bother making your own. This glaze is priced right, keeps well, and best of all, comes in a squeezable bottle so you can add some drama to your drizzle.
Good quality sea salt
Mini skewers
Directions:
- Cut the fresh basil leaves in long, wide strips (along the length of the leaf); wrap one strip around each cheese ball and skewer.
- Anchor a cherry tomato at the bottom of the skewer.
- Sprinkle with sea salt and drizzle with plenty of balsamic glaze. Serve immediately.
The Details:
Devil’s Rock Creamy Blue Cheese: Available for order online from the producer, Thornloe Cheese. Or locally from: Longo’s, Loblaws, Starsky Fine Foods, Sobeys, and Cheese Boutique. Call fist to ensure availability.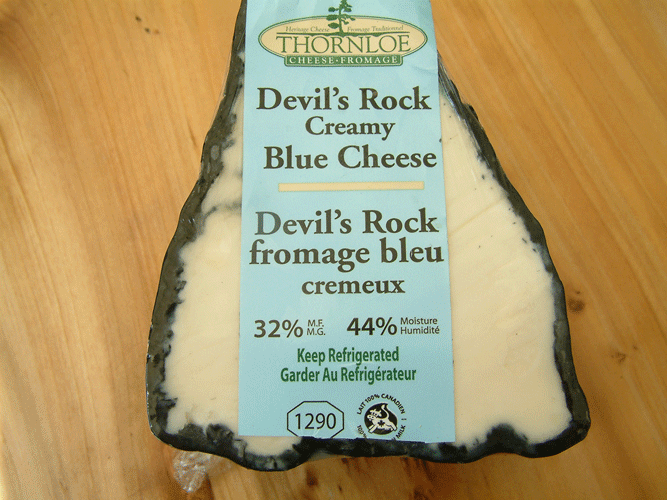 Campesino Serrano Ham: available at Longo’s.
 Gibbs Honey: Operated by 4th generation beekeeper Russell Gibbs. Hives in Canfield, Ontario.
Available at Centro Farmers’ Market every Sunday (between 9:00 a.m. and 12:00 p.m.) from July until it sells out.
Or order directly from Gibbs’ website by filling out the contact form (but hurry before it sells out): www.gibbshoney.com.
Gibbs Honey: Operated by 4th generation beekeeper Russell Gibbs. Hives in Canfield, Ontario.
Available at Centro Farmers’ Market every Sunday (between 9:00 a.m. and 12:00 p.m.) from July until it sells out.
Or order directly from Gibbs’ website by filling out the contact form (but hurry before it sells out): www.gibbshoney.com.
 De Nigris Balsamic Glaze: Sweeter and thicker balsamic reduction in handy squirt bottle. Available at Longo’s.
Bella Casara Mini Buffalo Mozzarella Soft Cheese: produced in Vaughan, Ontario by family-run Quality Cheese Inc.
Available at: Longo’s, Whole Foods, Loblaws. Call ahead to ensure availability.
De Nigris Balsamic Glaze: Sweeter and thicker balsamic reduction in handy squirt bottle. Available at Longo’s.
Bella Casara Mini Buffalo Mozzarella Soft Cheese: produced in Vaughan, Ontario by family-run Quality Cheese Inc.
Available at: Longo’s, Whole Foods, Loblaws. Call ahead to ensure availability.
 Reusable bamboo skewers: (in photo of Tomato Bocconcini Basil Skewers) courtesy of cobistyle.com.
Read More
Reusable bamboo skewers: (in photo of Tomato Bocconcini Basil Skewers) courtesy of cobistyle.com.
Read More 


Still hungry? Follow my posts and find lots more Olive on: