Category Side Dish

Farm-To-Table Fresh Asparagus: Andrews Scenic Acres

Olive is happy to report that local field asparagus season has begun! Despite the looming storm clouds, I was determined to drive out to Andrews’ Scenic Acres yesterday morning to do something I’ve long wanted to do: pick my own asparagus. It turned out to be a beautiful morning.

Andrews_Scenic_Acres

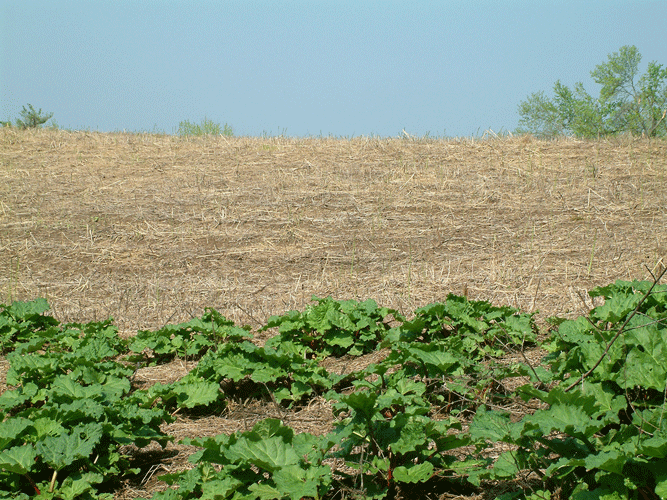
It is early in the season and the asparagus has just begun to come up alongside the rhubarb. Farmer Bert Andrews says the asparagus season will run from now to about mid June; the first of June will likely be the ideal pick-your-own period. The pick-your-own rhubarb season will run from now to about the end of June.

Andrews_Rhubab_Asparagus

The asparagus field looks like a a little comical with single spears poking up up from the ground, here and there. In the photo above, you can barely see them poking up along the horizon.

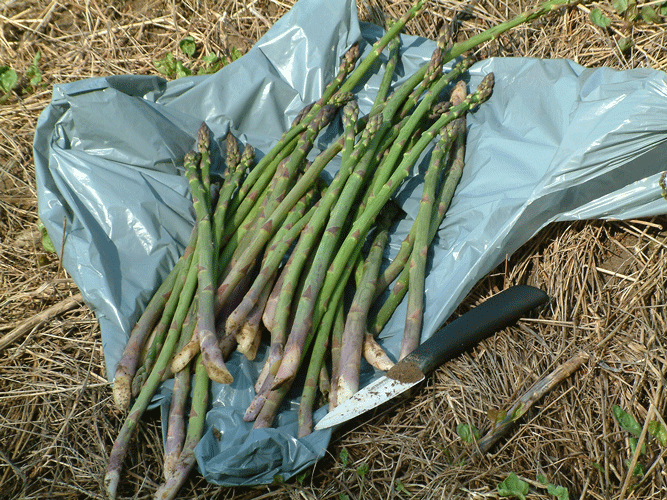
Asparagus

To ensure the asparagus will grow back again next year, cut the asparagus about one inch below the surface of the earth; it’s easy and Andrews’ will supply you with a knife. Wear rubber boots and protect yourself from mosquitoes.

Harvested Asparagus

You can’t get farm-to-table fresher than picking your own. I couldn’t resist trying a spear raw: it tasted green and robust and sweeter than the raw spears I have tasted from the grocery store. If you are tempted to try one of the many raw asparagus salad recipes that are trending right now, I recommend picking your own asparagus and eating the salad as soon as possible the same day.

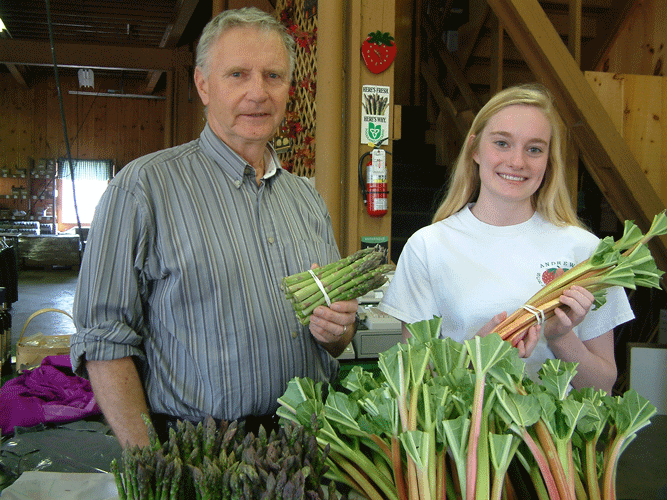
I decided to treat my Dad to a bundle of ready-picked asparagus that Farmer Bert Andrews (below left) brings in from Simcoe County while his asparagus is still so early in the season. Manager Stephanny (below right) helped me pick out a bundle of Andrews’ ready-picked rhubarb; I’ll turn it into stewed rhubarb to eat with my breakfast yogurt. Oh my, how Olive loves spring!

Bert_Andrews_and_Stephanny

Farmer Bert Andrews and Manager Stephanny

I prefer to eat my asparagus the day I buy it but it will keep in your fridge okay for a few days if you stand the stem ends in a jug of water or wrap them in a damp paper towel and cover the bunch in plastic wrap. I snap off the woody ends where they break naturally and wash each spear under cold, running water, paying special attention to the head where sand and grit get trapped. For tips on choosing, storing, and preparing asparagus visit Foodland Ontario.

My preferred method of cooking asparagus is oven-roasted. Oven-roasting caramelizes the asparagus and I find I don’t need to serve anything with it but a squirt of lemon juice. My Simple Oven-Roasted Asparagus recipe is here: http://olivetoeat.com/?p=858

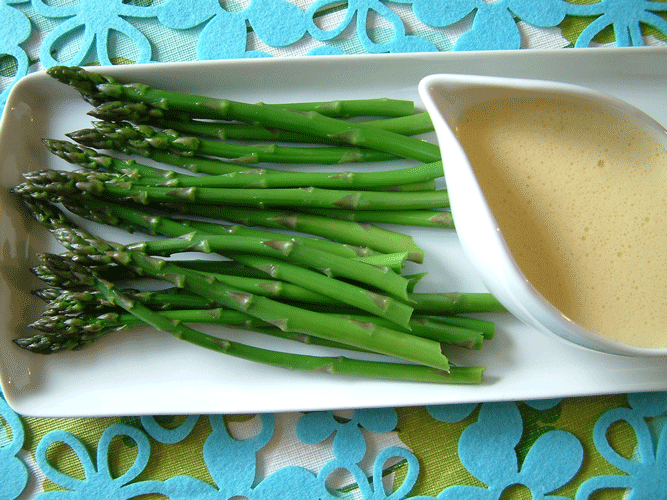
But what better way to celebrate the start of the local asparagus season than with a splurge of hollandaise sauce? A dear friend (and fabulous cook) recently gave me a great recipe for an easy and delicious blender hollandaise sauce. Scroll down to the bottom of this post for the recipe.

Asparagus_with_Hollandaise

Andrews’ Scenic Acres (established in 1980) and Scotch Block Country Winery (a fruit winery opened in 1999), is family operated and grows a wide variety of pick-your-own or fresh picked fruit, vegetables, and flowers. The barn market sells jams, jellies, pies, tarts, honey, maple syrup, juices and frozen fruit. House-made frozen yogurt and ice cream is made from farm-grown fruit. Family fun and harvest festivals.

Andrews’ Scenic Acres
9365 10th Sideroad
Halton Hills, Ontario

Telephone: 905-878-5807

Please call to confirm dates and time open.

Open daily: May 3rd to November 1st, from 9:00 am to 5:00 pm.

Open November 1st to December 31st, Saturday and Sunday plus the week before Christmas: 11am to 5pm.

Andrews’ Scenic Acres also sells their farm fresh produce at several local farmers’ markets. Click here for a list: http://www.andrewsscenicacres.com/farmmarket.php

Website: www.andrewsscenicacres.com
Twitter: https://twitter.com/AndrewsScenic
Facebook: https://www.facebook.com/AndrewsScenicAcres


Easy Blender Hollandaise Sauce

Makes 1/2 cup

This recipe was passed on to me by a dear friend and fabulous cook. Use a blender or food processor for best results.

Ingredients:

3 large egg yolks
1 tablespoon of water
3/4 cup unsalted butter
Freshly squeezed juice of 1/2 a lemon
1/4 teaspoon salt
Pinch of ground white pepper, freshly ground black pepper, or ground cayenne pepper.

Directions:

  1. Place butter in a small saucepan over low heat to melt.
  2. Plop water and egg yolks in a blender or food processor; blend for about 90 seconds.
  3. Turn the heat under the melted butter up to medium high, just until the butter starts to bubble.
  4. With the blender motor running, slowly pour the hot melted butter through the feeder tube in a thin, steady stream (don’t include the milky, foamy bits); sauce will thicken at this point.
  5. Again with the motor running, add the lemon juice, salt, and pepper through the feeder tube. Unplug the machine and taste to adjust seasonings, if necessary.
  6. Serve immediately with steamed asparagus, steamed artichokes, steamed new potatoes, poached eggs, or roasted fish.

Though the eggs are lightly cooked by the hot butter, as a safety precaution follow all food safety guidelines concerning the consumption of raw eggs.

Read More

New Year’s Resolution #1 Make Veggies the Star of the Plate: Mashed Caramelized Cauliflower & Steamed Vegetables with Flavoured Butter

I’m making vegetables the star of my plate by preparing them with a little extra love instead of treating them as an afterthought. I’ll either give them a leading role across half of my dinner plate or serve them solo in individual courses – as the French do – and give them centre stage. It is so satisfying to be served one or two carefully prepared vegetable courses (salads, soups, or cooked vegetables), followed by a smaller main dish.

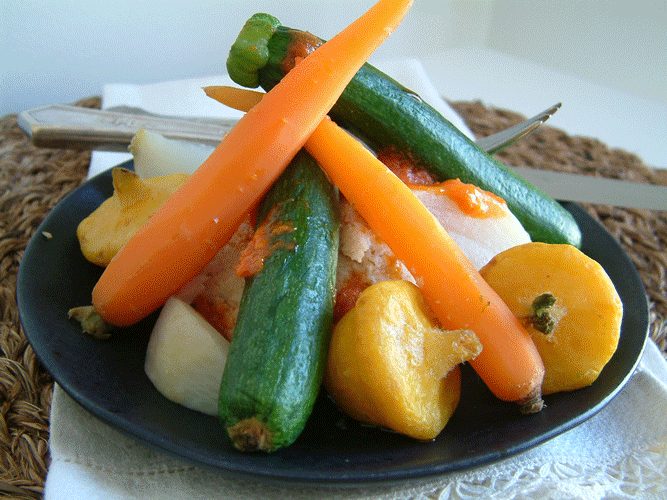
Steamed_Veggies_Flavoured_Butter

You don’t have to serve my Mashed Caramelized Cauliflower and Steamed Vegetables with Flavoured Butter together but I think they make a nicely composed plate. The cauliflower steps in for mashed potatoes and is mounded on the plate first; the steamed veggies are stacked artfully around the cauliflower and then adorned with fine sea salt and a tiny dollop of flavoured butter.

Make the flavoured butter first, ideally well ahead of time (you can even freeze it for longer storage). Prep the cauliflower and mixed vegetables earlier in the day. When you are ready to cook the vegetables, prepare the cauliflower first and keep it warm; then steam the vegetables. You can even make the cauliflower ahead and reheat it gently in the microwave just before serving; and you can make the steamed veggies ahead if you undercook them slightly, then later sauté them in the flavoured butter just until heated through – but they only take up to 8 minutes to steam, making them easy to do last minute.

Mashed Caramelized Cauliflower

Serves 4

The key to mashed cauliflower is to add as little liquid as possible. Roasting the cauliflower in the oven instead of boiling it prevents the cauliflower from becoming waterlogged and adds a delicious caramelized flavour. You can play with the flavours of this basic mash when you are puréeing the cauliflower, by adding curry powder, grated parmesan, or whatever you like to pair with cauliflower.

Ingredients:

1 head of cauliflower
1 tablespoon olive oil
½ teaspoon coarse salt
1 tablespoon butter, softened
3 tablespoons or more of milk or cream, warmed
Freshly ground black pepper, to taste

Directions:

  1. Preheat oven to 375°F. Remove and discard the leaves and large centre stalk of the cauliflower; cut the remaining cauliflower into evenly-sized florets; wash and then thoroughly drain.
  2. Dump the cauliflower (including the crumbly bits) onto a large, parchment-lined, rimmed baking sheet. Add oil and salt; toss with your hands to coat evenly; spread out evenly in a single layer. Roast for about 40 minutes, until the largest pieces are very tender and cauliflower is golden, turning once after 25 minutes.
  3. Transfer cauliflower to the large bowl of a food processor. Add butter. Purée until smooth, stopping to scrape down sides of bowl with a rubber spatula when necessary, and adding milk or cream slowly, only a bit at a time and just enough to get the consistency you want. Season to taste with freshly ground black pepper and additional salt, if necessary. Serve hot.
  4. If making ahead, transfer to an airtight container, cover, and store in the refrigerator overnight. When ready to serve, reheat gently in the microwave, stirring occasionally, until hot throughout.

Steamed Mixed Vegetables with Flavoured Butter

Serves 4

The butter is your palette and the vegetables are your canvas; choose whatever vegetables and butter flavouring combinations that please you most.

Curried Tomato Clementine Butter

Makes ¼ cup

This recipe is just a suggestion of how you can play around with different butter flavourings; the possibilities are endless – perhaps lemon and fresh thyme or lime and fresh basil (omit the curry powder, tomato paste, and clementine zest)?

Ingredients:

¼ cup unsalted butter, softened
Pinch of sugar
Pinch of salt
⅛ teaspoon Arvinda’s curry powder
1 tablespoon tomato paste
Finely grated zest of 1 clementine (avoid white pith)

Directions:

  1. Place all ingredients in a small bowl; mash with a fork, stirring to mix thoroughly.
  2. Place on a small sheet of parchment paper; roll into log, twisting both ends tightly to seal. Store in the refrigerator until ready to use.
  3. Slice or shave off the desired amount of butter onto freshly steamed vegetables, grilled fish, or roasted chicken. Any unused portions can be stored in parchment paper, enclosed in a resealable freezer bag, and placed in the freezer for longer storage.

Steamed Mixed Vegetables

Serves 4

Choose whatever combination of colourful, seasonal vegetables you like; again the possibilities are nearly endless. My local Longo’s carries baby Sunburst squash, baby zucchini, baby turnips, and real baby carrots (Harvest Fresh Sweet Nantes Carrots and not those bagged, pared down “baby” carrots). If you can’t find baby veggies, just cut whole veggies into smaller portions.

If you have a stacked steamer, place the veggies that take longest to cook on the bottom level and those that cook more quickly on the top level. I only have a single steamer, so I place them in groups all in one steamer. Either way, watch them carefully and remove each group of vegetables as soon as they are cooked to your liking.

Ingredients:

Salt for water
3 baby turnips, cut into eighths
6 baby carrots (comments in intro above), longer ones cut half
200 g baby Sunburst squash
200 g baby green zucchini
Flavoured butter (see recipe above)
Fine sea salt

Directions:

  1. In a large pot, bring salted water to a boil; reduce to a simmer. Arrange vegetables in groups in a steamer placed over the simmering water; cover and steam for 5 to 8 minutes, checking carefully and removing the vegetables as soon as they become tender (some will be ready before others).
  2. Serve hot, seasoned to taste with fine sea salt and adorned with flavoured butter.
Read More

Olive’s Keep Calm & Carry On Christmas Survival Guide: Freezer-Friendly Side Dishes for Your Festive Feast

I love to do Christmas to the nines, with silver bells and all the trimmings. My best friend shares my Martha Stewart-ish passion for Christmas. We start every season with big dreams but as Christmas Day approaches, find ourselves more stressed with less and less time, until we are gritting our teeth while peeling potatoes to It’s the Most Wonderful Time of the Year and feeling like pulling our hair out while fiddling with fancy last minute fixings.

As a solution, we started a tradition of gently nudging each other to get an early start on Christmas, so when it is time to celebrate we can step out of our kitchens and enjoy it with our families. Beginning in November, we send each other a flutter of quick emails like: Christmas cards ordered CHECK, outdoor lights up CHECK, cookie dough frozen CHECK. What starts off as encouragement to prepare as much as possible in advance, often ends up in a hilarious race of merrily checking off our own list while sending out cheeky CHECKS if the other has fallen behind.

From now until Christmas, I’d like to share some of my Christmas survival tips with you: suggestions to make your holiday entertaining well-planned, stress-free, and delicious with make-ahead, easy-assemble, or store-bought ideas. Think of them as little gifts from your freezer or pantry to you, with love from Olive.

Let’s get a head start on Christmas dinner this week with a freezer-friendly mashed potato casserole and sweet-and-sour cabbage that you can make now and freeze. All you will need to prepare on the day of your feast is turkey, stuffing (I love My Mom’s Sage & Onion Bread Stuffing), perhaps another family-favourite vegetable dish, and gravy.

Because we have such a big clan, my family keeps our feasts as simple as possible. Here is my tip for the gravy (but don’t tell anybody): homemade gravy from Longo’s turkey kits. The gravy is sold separately and tastes homemade. I don’t have to fuss at the last minute and I know it’s going to be good. As soon as the kits come out, I buy the gravy individually and freeze it. I just defrost the night before serving and reheat gently the next day. Sometimes I add a little white wine, just to make it extra special. After December 19th, the individual side dishes (including the gravy) and complete turkey kits will be available in all Longo’s stores. If you want to pre-order the entire turkey kit (includes pre-cooked turkey, butternut squash, herbed mash potatoes, multigrain rice stuffing, cranberry sauce, and gravy – all just requiring reheating) for you feast, you need to place your order by 5 p.m. December 18, 2013.

Christmas potatoes done CHECK. Christmas cabbage done CHECK.

Please visit my Grocery Store Directory for Longo’s locations.

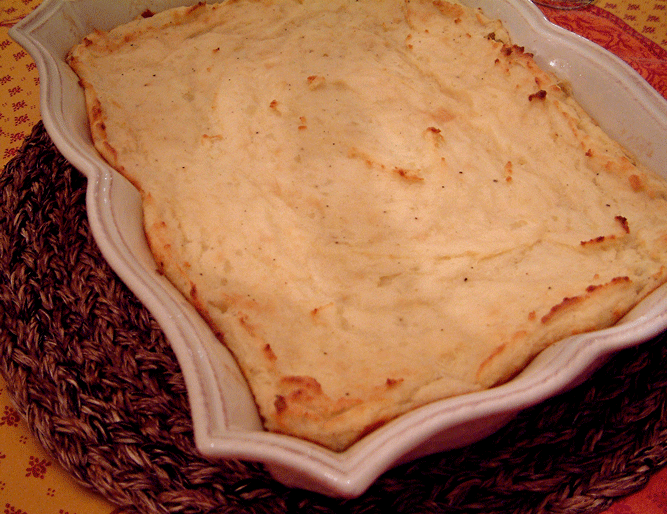
Swedish_potatoes

Aunt Connie’s Swedish Potatoes

Serves 8 to 10

A long-time family favourite (just like my Aunt Connie), we serve these make-ahead potatoes at every Thanksgiving or Christmas family feast. This time-tested recipe has been around for ages but did you know you can freeze it for up to 3 months? Don’t tell my family, but I make a double batch of these just before Thanksgiving and freeze a batch in throwaway aluminum foil pans to have ready for Christmas dinner. You’ll be so happy to pop these out of the freezer and then pop the tray in recycling after the feast is over. Take the potatoes out of the freezer two days before serving and defrost in the refrigerator. Bake them while the turkey has a good long rest and then gets carved up.

My Aunt Connie’s version calls for a crumb topping made with fine bread crumbs and melted butter, but I omit the crumb topping so I can stir the potatoes as they are warming up in the oven.

Ingredients:

6 medium-sized russet (baking) potatoes, peeled and cut into sixteenths
2 tablespoons butter, cubed
¾ cup dairy sour cream
1 package (125g) cream cheese, cubed, softened to room temperature
1 ½ teaspoons onion salt
¼ teaspoon ground white pepper or freshly ground black pepper
½ teaspoon salt

Directions:

  1. Place potatoes in a large pot; cover with cold, salted water; bring to a boil, then adjust heat to medium to maintain a gentle boil; cook uncovered, until potatoes are very tender, about 15 minutes. Immediately drain into a colander placed in the sink. Return potatoes to pot and place pot back over very low heat for a few moments, shaking constantly, until all water evaporates. Remove pot from heat.
  2. Add butter to potatoes; mash with a potato masher, until potatoes are smooth and lump-free. Fold in remaining ingredients; beat gently with a mixer, just until all ingredients are thoroughly incorporated.
  3. If freezing, turn potatoes into a large, well-buttered, disposable aluminum-foil baking dish. Let cool completely in the fridge; then place a sheet of parchment paper over top of potatoes; double wrap with aluminum foil, sealing securely; label with baking instructions; freeze up to 3 months. Remove wrapping and parchment prior to baking. Defrost in refrigerator for two days before serving. Bake uncovered, in the centre of a preheated 350°F oven, just until hot throughout, about 30 minutes or longer (stir once halfway through baking). Watch carefully after 30 minutes.
  4. If baking immediately after preparing, turn potatoes into a large, well-buttered casserole. Bake uncovered, in the centre of a preheated 350°F oven, just until hot throughout, about 30 minutes or longer (stir once halfway through baking). Watch carefully after 30 minutes. Note: prepared potatoes can be stored, covered in the fridge, for up to two days prior to baking. When ready to bake, bring casserole to room temperature before placing in a hot oven.

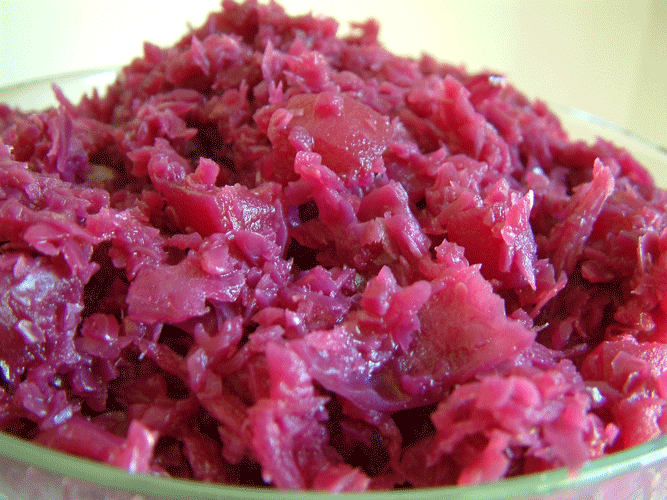
Cabbage

Jeff’s Sweet-Sour Purple Cabbage with Apples

Makes about 9 cups

Adapted from Sweet-and-Sour Red Cabbage with Apples by Johanna Burkhard (The Best Freezer Cookbook by Jan Main).

This sweet and sour cabbage recipe has always been a favourite of both my brother and my son. I just gave a bowl to my son and he said “Yo, cabbage for breakfast is awesome”. I love it because it’s a healthy and delicious way to easily add a pop of colour to a holiday plate – the purple looks so pretty beside green beans, broccoli, carrots, or squash.

It takes some work to finely shred the cabbage and prepare the apples and onions but it freezes really well for 3 months, so I make a double batch of this recipe at Thanksgiving and freeze the second batch for our Christmas feast. Or I freeze in smaller containers to use throughout the winter. Defrost in the fridge overnight and reheat gently on the stove. The flavours meld together with the second simmer.

If you are able to finely shred the cabbage in a food processor, cook this in one large pot. It will almost fill the pot but will cook down. Before I used a food-processor to shred my cabbage, I shredded it by hand; the cabbage wasn’t as fine and took longer to cook, so I had to divide one recipe between two large pots to speed the cooking – the end result was still delicious.

The recipe is from a cookbook called The Best Freezer Cookbook by Jan Main. It is the best freezer cookbook I have ever had my hands on – full of good freezing advice and comforting recipes, including a good Veggie, Beef & Pasta Bake, a yummy Chicken Tetrazzini, as well as some tempting soups and special occasion desserts I haven’t tried yet. I have changed the Sweet-and-Sour Red Cabbage with Apples recipe slightly, adding more apples, a touch more sugar, and using white wine and apple cider vinegar instead of red wine and red wine vinegar. It’s lovely with the red wine and the colour is a bit deeper, but I don’t drink red wine and hate wasting the rest of the bottle. I’ve also arranged the steps in a way that will keep your apples from browning before they hit the pot.

Equipment Notes:

Requires food processor and 1 large pot or two large pots

Ingredients:

1 medium purple cabbage
2 small yellow cooking onions
6 apples

2 tablespoons butter
1 cup chicken stock
½ cup white wine (or red wine)
1/3 cup apple cider vinegar (or red wine vinegar)
1/3 cup plus 1 tablespoon packed brown sugar
1 bay leaf
1 teaspoon salt
¼ teaspoon ground cinnamon
¼ teaspoon freshly ground black pepper
Tiny pinch ground cloves

1 ½ teaspoons cornstarch
1 tablespoon cold water

Directions:

  1. Finely shred cabbage and measure out exactly 10 cups to use for this recipe; set aside (use remainder in a salad). Finely chop onions; set aside. Peel, core, and dice apples.
  2. In a large pot, melt butter over medium heat. Add onions and apples; sauté, stirring frequently, until softened, about 10 minutes.
  3. Add stock, wine, vinegar, sugar, bay leaf, salt, cinnamon, pepper, and cloves. Bring to a boil, and then stir in cabbage. Reduce heat to medium-low, cover, and simmer, stirring occasionally, until cabbage is very tender, about 1 hour. Taste and adjust seasonings, if desired.
  4. In a small bowl, combine cornstarch with cold water; blend well, then stir into cabbage. Cook until sauce has thickened slightly, about 3 minutes. Remove and discard bay leaf. Serve hot.
  5. If freezing, let cool then divide into airtight freezer containers or resealable freezer bags, label, and freeze up to 3 months. Defrost overnight in refrigerator. Reheat gently on stove.
Read More

Fall Colours: Provencal Stuffed Baby Peppers

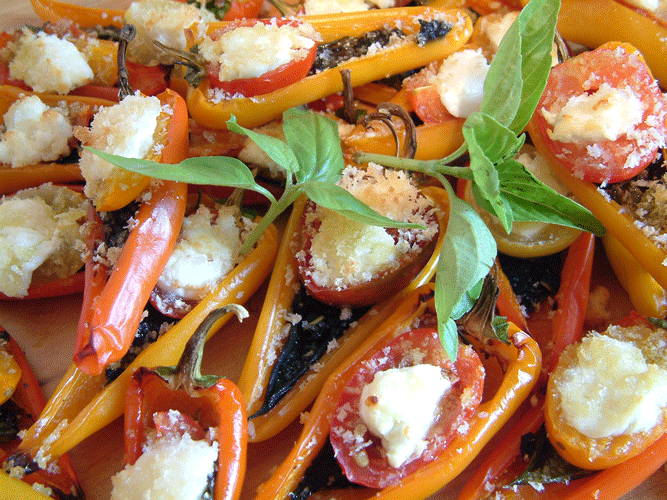
One fall, after taking his daughters on a lovely trip to Provence in the south of France, my father requested a Provençal-style Thanksgiving dinner. After such a memorable trip, we were more than happy to oblige. We spread out the sunny Provençal tablecloths that we bought at the market in Uzès. Then we laid out a delicious feast of roast turkey (and called it Dinde Rôtie), Potatoes Savoyard (Jane Rodmell’s Cottage Life’s Summer Weekends Cookbook), Cauliflower Gratin (Ina Garten’s Barefoot in Paris), Sweet Potato & Sage Brûlée (Lucy Waverman, Food & Drink Holiday 2007), and these pretty stuffed peppers, inspired by Laura Calder’s Tomato-stuffed Peppers (French Food at Home).  Colourful, flavourful, and oh so darling, they pair nicely with a glass of wine and a Provençal state of mind.

provencal_stuffed_baby_peppers

Provençal Stuffed Baby Peppers

Makes about 36 halves

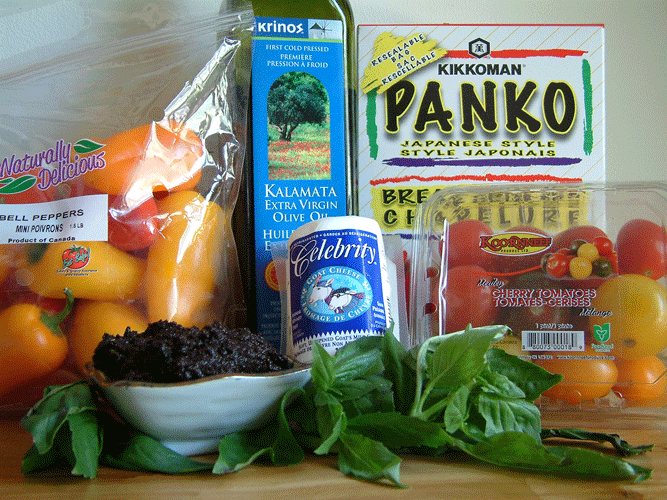
The brainchild behind this recipe is Laura Calder. I changed her recipe slightly, using baby peppers and cherry tomatoes instead of big ones, my olive purée instead of the stronger tasting tapenade, and added goat cheese for creaminess and a touch of panko bread crumbs for a slight crunch. Make the olive purée ahead of time, so there is less to do at assembly time.

provencal_stuffed_baby_peppers

Ingredients:

1 ½ lbs. mini sweet bell peppers, in a colourful medley of orange, yellow, red

1 pint cherry/grape tomatoes in a colourful medley of orange, yellow, red

1 bunch of fresh basil, stems removed

¼ cup Black Olive Purée (see recipe below)

1 small package (130 g) soft, unripened chèvre (goat’s milk cheese)

¼ cup panko bread crumbs

⅛ cup extra virgin olive oil

Sea salt

Directions:

  1. Preheat oven to 375°F.
  2. Cut each pepper in half, lengthwise from stem to tip, leaving the stems intact on both halves; remove and discard the seeds. Place pepper halves, cut side up, on a parchment-lined, rimmed baking sheet; roast until the peppers are slightly tender but still hold their shape, about 10 to 15 minutes. Remove pan from the oven; let peppers cool slightly but leave them on the tray and leave the oven on at 375°F.
  3. Meanwhile, cut the tomatoes in half, lengthwise; remove and discard seeds and pulp. Turn halves upside down to drain while peppers are roasting.
  4. When step two is completed, place 1 large basil leaf or two smaller basil leaves in each pepper half.
  5. Place 1/8 teaspoon of olive purée on top of basil; carefully spread out the purée a little.
  6. Place a tomato half, cut side up, on top of the olive purée, choosing a contrasting-coloured tomato for each pepper. If tomato halves are too big, cut them in half lengthwise again.
  7. Place ½ teaspoon of goat cheese in each tomato half.
  8. Repeat with remaining peppers.
  9. Sprinkle the panko bread crumbs evenly over the top of the peppers.
  10. Drizzle the peppers evenly with olive oil.
  11. Return pan to the oven and bake until cheese is soft and bread crumbs are lightly golden, about 10 minutes. Sprinkle lightly with sea salt, to taste. Serve warm.


sundried_moroccan_black_olives Black Olive Purée

Makes about 1 ½ cups.

Inspired by a Patricia Wells recipe (Olive Purée from Nyons, The Provence Cookbook), this spread is similar to tapenade but doesn’t include the strong flavours of capers, anchovies, and mustard which I find overpowering. Here, the olives are the star. I use thyme and rosemary (instead of herbes de Provence) and I throw in a garlic clove just for good measure. Oh, wouldn’t I love to get my hands on the Nyons olives that inspired Ms. Wells to create her recipe! Instead, I use the wrinkly but meaty, sun-dried black olives (such as the flavourful, sun-dried Moroccan olives that Longo’s currently carries in their olive bar). Whatever you do, don’t use totally flavorless canned black olives. Use this spread sparingly because it is quite salty.

Ingredients:

2 cups best-quality sun-dried black olives, pitted

1 teaspoon dried thyme

1 teaspoon dried rosemary

1 clove of garlic

2 teaspoon extra virgin olive oil, if required

Directions:

  1. Combine all of the ingredients, except for the oil, in a food processor or blender. Blend to a thick paste; if too thick, add oil and blend again.
  2. Serve immediately or transfer to an airtight container and cover; store in refrigerator for a few days or in the freezer for longer storage. Defrost before serving. Serve chilled or at room temperature.
Read More

Heritage Cookbook: Mom’s Sage & Onion Bread Stuffing and Mom’s Apple Crisp

I love to have our extended family gathered around us, joined together by food at a family feast. That’s how I imagine heaven, all of us together again, around the table. We’d wear silly paper hats. We’d crack up over my brother’s humour and marvel over my father-in-law’s poetic recitals. Roast turkey and my Mom’s Sage & Onion Bread Stuffing would scent the air. My Grandma’s Stained Glass Window Cake and my Nana’s Carrot Christmas Pudding would make a grand entrance. I’d peer through the elbows on the tables, at the smiles of all my loved ones.

I have wonderful memories of my Mom and I cooking our family feast in her kitchen. While my Dad sang Silver Bells in the background (happy to be the errand boy), Mom and I would talk for hours as we wrestled with the bird and happily cooked our way through our family-favourite casseroles and all the fixings of a holiday feast. I loved it when my Mom asked me to taste-test her stuffing: “is there enough butter, onion, broth, sage?” It was just a simple Sage and Onion Bread Stuffing recipe from her Better Homes & Gardens cookbook, but my mom knew how to season it just right.

My Mom was very modest about her cooking abilities – yet to this day, I have never tasted a better Chicken Divan, potato-egg salad, turkey stuffing, or apple crisp. We all have our favourite recipes made by our mothers that we grew to love so much.

My sisters and I have taken over the cooking for my side of our ever-expanding clan. We make the traditional, family-favourite recipes that Mom used to serve: my aunt’s Swedish Potatoes, Mom’s Sage & Onion Bread Stuffing, and Vegetables Supreme (from the first Fare for Friends cookbook). I only recently perfected my Grandma’s Stained Glass Window Cake recipe, which I cooked from a recipe scribbled down too hastily on a scrap of paper – it took me a couple of tries to get it right. I have my Nana’s Carrot Christmas Pudding recipe that I may try to make this Christmas. It’s so important to accurately record these heritage recipes to pass down to future generations.

On that note, I have a really great idea I want to share with you. Why not create your own cookbook of treasured family recipes, photos and stories, and then give copies to family members as Christmas gifts? It’s far easier than it sounds. I have come across a fabulous website – HeritageCookbook – that allows you to easily create your own cookbook on-line, with a minimum order of only four cookbooks. Become a free trial-member for 30 days and invite as many people as you want to submit recipes and photos from their own computer, by logging on to your registration. You’ll have access to HeritageCookbook’s templates, photo library, and support. Most people complete their cookbooks within the free-trial month but if you don’t, the monthly fee is minimal. When you are finished, the cookbooks are printed on quality, coated paper with laminated covers.

Though their customer base is largely American (the pricing on the website is in American funds), the company is Canadian-owned and the books are printed in Toronto. HeritageCookbook has printed over 200,000 quality cookbooks and has been recommended by Oprah, Rachel Ray, and one of my friends. The wheels are turning in my head. Which project shall I start with: a family treasury, a church fundraiser, or perhaps my own Olive to Eat cookbook? I can’t wait to get started.

To both sides of our family – near and far, from the other side of the continent to the other side of the Atlantic, and to those we hold close in our hearts – I’m so grateful for the memories, old and new. Happy Thanksgiving.

Mom’s Sage & Onion Bread Stuffing

Serves 4 to 6

This recipe is from my Mom’s Better Homes & Gardens cookbook that she received as a wedding gift back in 1954. She made it every Thanksgiving and Christmas. The key to this simple, classic stuffing is to season it to your taste – but make sure you use lots of butter and sage. We always add more of each ingredient than the recipe calls for but never measure – so start out with the recipe, then slowly add more, tasting as you go along, until it tastes just right.

Since the recipe only serves 4 to 6 people, you will likely need to multiply the recipe for a larger feast. If you are stuffing your turkey, calculate 1 cup of stuffing for 1 pound of uncooked turkey; don’t stuff your turkey until you are ready to put it in the oven; promptly remove any leftover stuffing from the cooked carcass and store separately in the refrigerator. I have heard a lot of talk lately about cooking your turkey unstuffed and cooking the stuffing in a separate baking dish. By the time you get the stuffing in the turkey’s cavity heated to a safe internal temperature of 165°F, you dry out the poor bird. Makes sense to me, so my recipe instructs you to cook it in a separate casserole while the turkey rests.

Ingredients:

4 cups dry bread cubes – “stuffing croutons” that grocery stores bring in for the holidays

3 tablespoons (or more) finely chopped yellow onion

1 teaspoon (or more) salt

¼ teaspoon (or more) freshly ground black pepper

¼ teaspoon (or more) poultry seasoning

¼ teaspoon (or more) ground sage

1/3 cup (or more) melted butter

Hot chicken broth or water, just enough to moisten the bread

Directions:

  1. Combine bread, onion, and seasonings in a large bowl; add butter and toss. Slowly add hot broth, bit by bit, until bread is just moistened. Taste and if necessary, add more onion, broth, butter, or seasonings, until seasoned to your taste. Toss gently to mix thoroughly.
  2. Place stuffing mixture in an ovenproof casserole; cover and chill until ready to bake.
  3. Preheat oven to 350°F. Bring stuffing casserole to room temperature before placing in preheated oven. Bake, covered, until hot throughout and flavours have melded together – about 30 to 45 minutes. Serve warm.

Mom’s Apple Crisp

Makes one 9”-square baking dish.

I have my Mom’s handwritten copy of this recipe. She called it Apple Crisp – Dad’s Favourite and included a little story about the recipe’s origin – it was submitted to St. Andrews United Church in Chatham, by the mother of my aunt’s boyfriend in grade 4 in 1942.

Apple Crisp

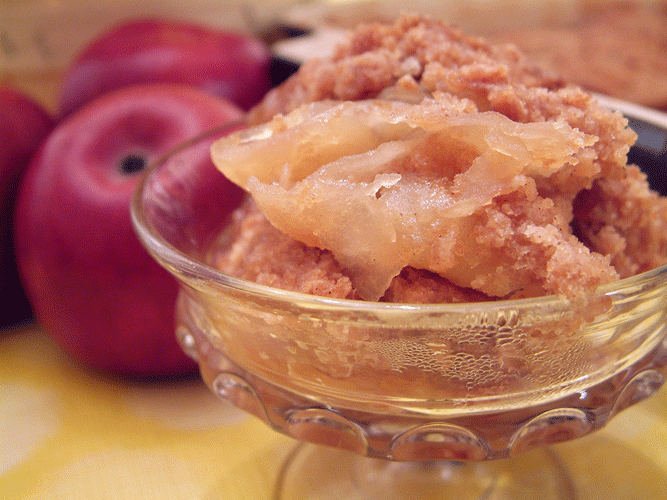
This is an easy – and I think more delicious – way to enjoy warm apple pie without the fuss of the crust. It is packed with tart apples and brown sugar and has a crumbly, cinnamon-scented streusel topping. The butter, spices, apple juices, and brown sugar meld together in a delicious mélange that caramelizes around the edges. It smells so wonderful cooking. Serve warm with vanilla ice cream – or perhaps Belly Ice Cream’s Caramel and Sea Salt.

A note on cinnamon: thanks to some helpful advice from Chef Michael Smith, I have fallen in love with Vietnamese cinnamon. I couldn’t get my hands on the brand that Chef Michael uses but found McCormick Gourmet Organic Ground Saigon Cinnamon at my local grocery store – Longo’s Glen Erin. I compared the taste between Saigon Cinnamon, regular cinnamon, and a third gourmet organic cinnamon I picked up at another grocery store, all very recently. To me, the Saigon Cinnamon is the most aromatic, flavourful, and spiciest of the three cinnamons. Olive it! Thank you Chef Michael Smith!

Apple Crisp

Ingredients:

Filling:

5 cups cored, peeled, and very thinly sliced apples (about 6 to 8 apples, ask your farmer which available apples are best for apple crisp)

¾ cup packed light brown sugar

Dash of grated nutmeg

Topping:

½ cup packed light brown sugar

¾ cup all-purpose flour (measured by spooning in, then leveling off with a knife)

½ teaspoon ground cinnamon (preferably Vietnamese cinnamon)

Pinch of salt

4 tablespoons cold unsalted butter, cut into small cubes

Directions:

  1. Place oven rack in middle of oven; preheat oven to 375°F.
  2. In a large bowl, toss the apples with ¾ cup brown sugar and dash of nutmeg until evenly coated. Pour filling into a 9” square baking dish and level gently with a spatula.
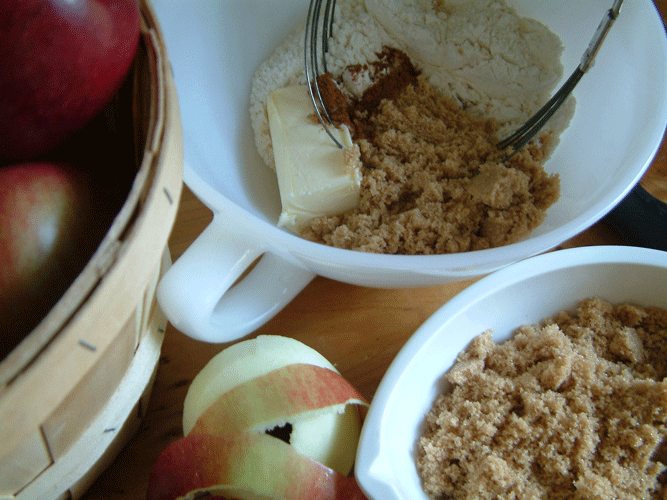
  3. Add all topping ingredients (except butter) to a medium bowl; stir to combine evenly. Add butter to bowl; blend with your fingertips or a pastry blender to break down the butter into the flour until the mixture becomes crumbly, resembling coarse breadcrumbs without any large chunks of butter. Sprinkle topping mixture evenly over apples.
  4. Bake until apples are tender and topping is browned, about 35 minutes. Let rest 5 to 10 minutes before serving.
  5. Spoon into pretty cups and serve warm with vanilla ice cream or cold with whipped cream.

Read More