Category North American

My Irish Eyes are Smiling: Halving the Potato at Cuchulainn’s Irish Pub

Okay, so I am not exactly Irish though I like to believe that everybody’s got a little Irish in them. When St. Patrick’s Day rolls around, here is how I love to celebrate it: Cuchulainn Crisps shared with good friends at Cuchulainn’s Irish Pub, in Streetsville. As the Irish saying goes, ‘it’s easy to halve the potato where there is love’.

Cuchulainn_Crisps

These homemade Irish potato chips are a tasty tribute to the humble potato. Fresh potatoes are sliced just thick enough to have a little potato substance to them, fried up crisp, and then smothered with melted cheese and green onion. Add crumbled bacon and chopped fresh tomato, if you wish. Served with sour cream for dipping.

Now my friends have me hooked on Cuchulainn’s Hill o’Chips, a traditional Newfoundland dish known as CDG (chips, dressing, and gravy): French fries are topped with a Newfoundland-style bread dressing (stuffing) made with savoury (instead of sage) and smothered in beefy gravy. They say it is Newfoundland’s answer to poutine; I say it’s SDG (so darn good). Add chicken curry, if you like.

Cuchulainn_Hill_o'Chips

Cuchulainn’s is an authentic, family-owned and managed Irish pub, serving Irish whiskeys, scotches, a wide selection of draught beer, and Irish and British food. My nephew likes the Guinness Stew: beef braised in Guinness beer with potatoes, carrots, and onions and served with Irish soda bread. My son loves the Dublin Dip: a thinly sliced roast beef sandwich topped with onions, mushrooms, and mozzarella and served with beef jus for dipping.

Enjoy Irish dancers and live music on Monday March 17th 2014, from 3:00 p.m. to 1:00 a.m. A five dollar donation to The Crohn’s and Colitis Foundation of Canada (CCFC) will be accepted at the door. Check Cuchulainn’s events page for St. Patrick’s week celebrations.

It may not be spring yet but as the song goes “When Irish eyes are smiling…’tis like the morn in spring. In the lilt of Irish laughter, you can hear the angels sing.”1 To all of my Irish friends, and the rest of us who want to be Irish for a day, Happy St. Patrick’s Day!

Cuchulainn’s Irish Pub
158 Queen Street South
Mississauga, ON
L5M 1K8
Telephone: 905-821-3790
Website: http://www.cuchulainns.ca/index.html
Twitter: https://twitter.com/CuchulainnsPub
 
Hours of Operation:
Sunday: 10:00 a.m. to midnight
Monday: 11:00 a.m. to midnight
Tuesday: 11:00 a.m. to 1:00 a.m.
Wednesday: 11:00 a.m. to midnight
Thursday: 11:00 a.m. to 1:00 a.m.
Friday: 11:00 a.m. to 2:00 a.m.
Saturday: 10:00am to 2:00am
 

1When Irish Eyes are Smiling:
Songwriters: George Graff, Ernest R. Ball, Chauncey Olcott.
Published by Lyrics © Warner/Chappell Music, Inc., EMI Music Publishing, WINDSWEPT HOLDINGS LLC, CARLIN AMERICA INC
Read More

A Taste of the Tropics: Crawford’s Luscious Lime Pie

UPDATE: Crawford’s Village Bakery is closing November 30, 2014.

When I’ve had my fill of winter I start to crave a little taste of the tropics, especially if I can’t actually make it there. Crawford’s Luscious Lime Pie is just the ticket. It’s Crawford’s version of Key Lime Pie but without eggs. Cream cheese and sweetened condensed milk are the rich and creamy foil  for a burst of tangy lime juice and lime oil; the filling is set on a lovely graham cracker crumb crust and piped with whipped cream.

Crawfords_Luscious_Lime_Pie

Crawford’s Luscious Lime Pie is a sumptuous smack of sunshine. Can’t you just feel your taste buds tingling with a luscious lick of lime?

Crawfords_Lime_Pie

Like all of Crawford’s pies, it is made from scratch using quality ingredients. While Crawford’s regularly available pies are baked fresh seven days a week, their specialty pies – like Luscious Lime Pie – are baked fresh on specific weekends throughout the year.

Hurry, Luscious Lime Pie is only available for three more weekends until mid March. Katie makes them as fast as she can but it is hard to keep up with the demand so be sure to call ahead to order.

Stay tuned to my Facebook page or Crawford’s Facebook page for updates on when Crawford’s will launch their Easter Egg Pie and other specialty and seasonal pies throughout the year.

Crawford’s Village Bakery & Distinctive Foods
2809 Bovaird Drive West
Brampton, ON
Telephone: 905-451-0347


View Larger Map

Read More

Olive’s Keep Calm & Carry On Christmas Survival Guide: Make-Ahead Holiday Hors d’Oeuvres

Here is my holiday line-up of make-ahead, easy-assemble, or store-bought hors d’oeuvres, ranging from comforting to exotic, that are so delicious they will make you the talk of the town.

Paneer_Tikka_Stuffed_Mini_Potatoes

Paneer Tikka Stuffed Mini Potatoes

Makes 32 halves

My Paneer Tikka Mini Potatoes are stuffed with an exotic combination of Indian spices tamed by rich coconut milk, tomato paste, and soft paneer cheese. Mmm…cheese, potatoes, and a touch of the exotic in a make-ahead, freezer-friendly recipe – everything I am looking for in a special occasion hors d’oeuvres.

It’s well worth seeking out Arvinda’s Tikka Masala spice blend for this recipe. Based in Oakville, Ontario, Arvinda’s makes artisanal, premium Indian spice blends, using Canadian grown spices whenever possible, like mustard seed and coriander. Their Tikka Masala is a lively blend of all natural ingredients, including fresh organic garlic from Stratford, Ontario and fresh ginger.   It’s hot but the tiny amount in this recipe will blanket you in a pleasant (not painful) warmth with layers of flavour. You can find Arvinda’s finely crafted range of Indian spice blends in fine food stores throughout Ontario. Check their website for a store near you.

Paneer cheese is a mild, fresh, farmer white cheese. It is now widely available in many supermarkets or Indian grocery stores.

Ingredients:

Potatoes:
16 mini Yukon Gold potatoes, uniformly medium-sized
1 tablespoon olive oil
¼ teaspoon coarse salt

Stuffing:
1 cup (scant) finely diced paneer cheese
½ teaspoon Arvinda’s Tikka Masala spice mix
½ teaspoon salt
1½ teaspoons tomato paste
½ cup canned coconut milk, well-shaken

Garnish:
Finely chopped chives, green onion, or cilantro

Directions:

Potatoes:

  1. Preheat oven to 375°F. Cut potatoes in half so that each half will sit upright. Dump on parchment-lined baking sheet. Add oil and salt; toss to coat potatoes evenly. Arrange on baking sheet cut side up and evenly spaced so potatoes aren’t touching each other. Roast in a 375°F oven until just tender, 25 to 30 minutes. Let cool on baking sheet.

Stuffing:

  1. Using the pointed end of a vegetable peeler or a small spoon, carefully scoop flesh out of potato into a medium bowl, leaving a thin wall of flesh lining the potato skin. Roughly mash the flesh with a potato masher or fork.
  2. Add stuffing ingredients to mashed potato; mix well. Mound stuffing in potatoes halves.
  3. If serving immediately, arrange on parchment-lined baking sheet; bake at 375°F until hot throughout and cheese is soft, 7 to 10 minutes. Sprinkle garnish of your choice over top of each potato. Serve warm.
  4. Or place in an airtight container, separating layers with parchment paper, cover and store in the refrigerator overnight. Bring to room temperature while preheating oven to 375°F degrees. Arrange on parchment lined-baking sheet and bake until hot throughout and cheese is soft, 7 to 10 minutes. Sprinkle garnish of your choice over top of each potato. Serve warm.
  5. Or place in an airtight container, separating layers with parchment paper, cover and freeze up to 2 weeks. Bake from frozen in a 375°F oven, arranged on a parchment-lined baking sheet, until hot throughout and cheese is soft, about 15 minutes. Sprinkle garnish of your choice over top of each potato. Serve warm.


Muhammara

Muhammara: A Seductive Syrian Dip

You’ll find my recipe for a seductively delicious dip, that is festively colourful and healthy. in my post Mississauga Meet Muhammara: A Seductive Syrian Dip. This intriguing little number has layers of flavour and texture: roasted sweet red peppers, crunchy walnuts, acidic tomato paste and lemon juice balanced by sweet and tangy pomegranate molasses, and a warm spicy heat that slowly unveils itself. It’s a breeze to make at the last minute with most items stocked in the pantry, or it can be made ahead and refrigerated for a couple of days. or even frozen for up to 2 weeks. If you would rather purchase ready-made Muhammara, my post tells you where to buy a good one.

Cheddar_Cayenne_Cookies

Cheddar Cayenne Cookies

Makes 4 logs (about 24 cookies in each log)

Adapted from www.chatelaine.com Cheddar Crisp Appetizers

These savory cookies have a rich, cheddar flavour with a bit of a spicy kick. They are delicious on their own but spoon on Rootham’s Tangy Red Pepper Jelly or Yummies in a Jar Apple Sage Jelly and they become extra special. Make the dough ahead, roll it into logs, and freeze for up to 1 month; then simply take the dough out a few minutes before slicing and baking to serve your guests freshly baked cheddar cookies with pizzazz.

I’ve adapted a Chatelaine recipe by adding a touch of cream for moistness and a cup of grated old cheddar cheese for even more cheddar flavour. I use Stirling Creamery European-Style Churn 84 Salted Butter which has a rich butter flavour from 84% butterfat. Stirling also makes an unsalted version of Churn 84 but it’s hard to find in our region – you might find it in Sobey’s. If you would prefer to use unsalted butter, increase the salt in the recipe to 1 teaspoon.

Ingredients:

2 cups all-purpose flour
½ tsp table salt
½ tsp ground cayenne pepper (optional)
1 (250 g) container MacLaren’s Imperial Cold Pack Sharp Cheddar Cheese
1 cup Stirling Creamery European-Style Churn 84 salted butter, cut into small cubes
2 tsp Dijon mustard
4 tablespoons 35% cream
1 cup grated old cheddar cheese

Directions:

  1. In a medium bowl, combine flour, salt, and cayenne; stir with a wire whisk until evenly distributed.
  2. Break up MacLaren’s Imperial Sharp Cold Pack Cheddar Cheese with a fork before dumping it into the large bowl of a food processer; pulse a few times to break down to large crumbs. Add butter, mustard, and cream; process until smooth, stopping machine to scrape down sides with a rubber spatula as necessary. Add grated cheese and flour mixture; pulse, occasionally stopping machine to scrape down sides with a rubber spatula, just until mixture comes together.
  3. Scrape dough on to a large piece of parchment paper. Gently form into a ball by kneading gently once or twice. Divide dough into 4 equal sections. Place 1 section on another large piece of parchment paper. Roll dough section gently to form an evenly shaped log, about 1-1/2 inches wide by 6 inches long. Wrap in parchment paper then twist ends to seal. Repeat with remaining dough. Refrigerate until firm, at least 3 hours or overnight. Or wrap logs in aluminum foil and seal in a resealable freezer bag, label with baking instructions, and freeze up to 1 month; remove from freezer for a few moments before slicing and baking.
  4. When ready to bake, place oven rack on bottom shelf; preheat oven to 400°F. Slice one well-chilled log into 1/4-inch thick rounds; arrange (evenly spaced) on a parchment-lined cookie sheet. Bake one sheet at a time, on the bottom rack, just until edges are slightly golden brown, about 8 minutes; immediately remove cookies from cookie sheet and place on rack to cool. Repeat with remaining logs, removing 1 log at a time from the fridge.
  5. Best eaten the day you bake them but still good within a few days after baking, if placed in a sealed container and refrigerated. Serve at room temperature with apple sage or red pepper jelly. Look for Rootham’s Tangy Red Pepper Jelly or Yummies in a Jar Apple Sage Jelly at gourmet food shops such as The Shop For All Reasons in Streetsville, gourmet grocery stores such as Cousin’s Market in Port Credit, or fine cheese shops such as Mill Street Cheese Market in Georgetown (see my Grocery Store Directory). Or click on the product link to go directly to the product website for store locations.


Cheddar_Dip

Sorry about the cheesy photo. I got a little carried away with the deer.

Hot Cheddar Dip

Enough to feed a crowd.

Adapted from Hot Cheese Spread from Best of Bridge

I’ve amped up the Hot Cheese Spread recipe from Best of Bridge to replicate the flavours of a dip I served in the ‘80s and loved, but lost the recipe. Artery-clogging but so delicious, I only serve this decadent dip at Christmas.

Make it ahead and store in the fridge for a few days. It makes enough to feed a crowd, so sometimes I split one batch into two if I have two smaller gatherings to attend. I have even frozen it, which isn’t ideal because the oil separates while baking, but once you have drained off the oil, you are still left with a ton of flavour, a lot less fat, and a bit of a stringier dip.

Ingredients:

1 cup slivered almonds
3 cups grated old cheddar cheese
2/3 cup finely chopped green onions (5 or 6 green onions)
1 garlic clove, finely minced
½ teaspoon curry powder
Dash cayenne powder
½ teaspoon salt
½ teaspoon soy sauce
½ teaspoon Worcestershire sauce
1 cup mayonnaise

Accompaniment:

Baguette crisps such as Ace Bakery Olive Oil & Sea Salt Mini Crisps

Directions:

  1. Preheat oven to 325°F. Spread almonds out in a single layer on baking sheet and toast lightly, just until golden, 3 to 5 minutes. Immediately remove from baking sheet to cool.
  2. In a medium bowl, mix cheese, onion and garlic together. In a separate bowl, combine curry powder, cayenne powder, and salt. Add soy sauce, Worcestershire sauce, and mayonnaise; blend thoroughly with a whisk. Fold into cheese. Add almonds. Stir until thoroughly mixed.
  3. Pack into an oven-proof serving dish. Bake immediately, or cover tightly and store in the refrigerator for a few days. Bring to room temperature before placing in a 350°F preheated oven. Bake just until hot throughout, about 15 minutes. Wonderful served with Ace Bakery Olive Oil & Sea Salt Mini Crisps.


Tomato_Bocconcini_Skewers

Tomato Bocconcini Basil Skewers

If you can get your hands on some really good cherry tomatoes and real buffalo mozzarella mini cheese balls, this festively-coloured hors d’oeuvres is easy-assemble and healthy. Click on my post Easy Breezy Summer Apps and scroll down for the recipe and details.

Keep calm and carry on. Love, Olive.

Read More

Streetsville United Church Fall Craft Show: Chili Con Carne

I often think of the women of my church as the Divas Who Dish Divinely. After countless bake sales, church luncheons, and casseroles for friends in need, years of practice have perfected their “from-scratch” recipes and turned them into best-in-show treasures.

The Divas Who Dish Divinely (AKA Streetsville United Church Women) will be dishing up some delicious food again at the 46th annual Streetsville United Church Harvest of Crafts Sale, this Saturday October 26, 2013 from 9:30 a.m. to 3:00 p.m., at Streetsville United Church.

Olive the Streetsville United Church Harvest of Crafts Sale because it invites the surrounding community to come together under one roof. Our fundraising efforts help support various local outreach programs. And of course, the food is delicious.

Our all-day café offers you a spot to sit, chat, and replenish your shopping-weary soul. Several women make their own batches of chili con carne and chicken soup, then combine them all into one heavenly pot of chili and one ethereal pot of chicken soup. Sandwiches, salads, and homemade desserts are made with care.

Make the baking table your first stop: delectable pies, cakes, cookies, and squares are all made from scratch and sell out quickly. Our local harvest is preserved in pretty jars to enjoy throughout winter. The sale is brimming with creative and witty, inexpensive crafts made by the talented Streetsville United Church Women. Local artisans offer a variety of unique, handcrafted gifts. There is always a special find in the Attic Treasures collection of gently-used modern and vintage finds. Come and get your Christmas shopping done early.

After working all day at the craft show, while the aroma of simmering chili wafts from the kitchen, I come home tired and craving chili. Here is my recipe.

chili_con_carne

Chili Con Carne

Serves 8

This classic chili simmers for five hours but it is much more flavourful cooked slowly and lovingly on the stovetop than abandoned in a slow cooker. Start it early in the day, refrigerate overnight, and reheat gently the next day to further deepen the flavour. If you have two large pots, you can double the recipe and stock your freezer with chili to warm up the chilly months that lie ahead.

I learned this old Southern tip from my friend, Bill, (who learned it from his friend from Kansas City): gently stir in a tablespoon of peanut butter near the end of cooking to smooth out the acidity and round out the flavour of the chili. For years I made this recipe without the peanut butter and still loved it, so if there is a peanut-allergy concern, leave it out.

Ingredients:

4 tablespoons olive oil

About 2 pounds (1kg) extra lean ground sirloin

2 yellow cooking onions, chopped

6 garlic cloves, finely minced

2 yellow or orange sweet bell peppers, cored, seeded, and chopped

4 celery stalks, chopped

1 28 fl oz/796 mL can diced tomatoes

1 19 oz / 540 mL can red kidney beans, drained, rinsed, drained again

1 28 fl oz/796 mL can crushed tomatoes

1 teaspoon coarse salt

1 teaspoon white sugar

2 tablespoons ground chili powder, to taste

½ teaspoon ground cumin

¼ teaspoon ground cinnamon

2 bay leaves

Finish:

1 tablespoon smooth peanut butter

Freshly ground black pepper and coarse salt, to taste

Few dashes of hot sauce (such as Tabasco or Piri Piri), to taste

Optional Garnishes: shredded cheddar cheese, sour cream, lime wedges, hot sauce, chopped avocado, fresh cilantro leaves, tortilla chips, or garlic bread.

Directions:

  1. Heat a large heavy pot over medium heat; add onions and ground sirloin and brown, breaking up with a wooden spoon and stirring frequently, just until meat is no longer pink inside, about 10 minutes.
  2. Add garlic; sauté for 1 minute, stirring constantly.
  3. Add remaining ingredients, except peanut butter; stir. Partially cover with a lid; simmer for 4 3/4 hours, stirring occasionally.
  4. To finish, stir in peanut butter and simmer, stirring occasionally, 15 more minutes. Remove and discard bay leaves. Season to taste with salt, pepper, and hot sauce.
  5. Let cool and then refrigerate overnight to allow flavours to mellow further. When ready to serve, reheat gently. Serve hot with your choice of optional garnishes.
Streetsville United Church
274 Queen St. South
Mississauga, Ontario
L5M 1L8

Harvest of Crafts Sale Hours: Saturday October 26 from 9:30 a.m. to 3:00 p.m.

Free Admission. Appreciate your support.

View Larger Map

Read More

Heritage Cookbook: Mom’s Sage & Onion Bread Stuffing and Mom’s Apple Crisp

I love to have our extended family gathered around us, joined together by food at a family feast. That’s how I imagine heaven, all of us together again, around the table. We’d wear silly paper hats. We’d crack up over my brother’s humour and marvel over my father-in-law’s poetic recitals. Roast turkey and my Mom’s Sage & Onion Bread Stuffing would scent the air. My Grandma’s Stained Glass Window Cake and my Nana’s Carrot Christmas Pudding would make a grand entrance. I’d peer through the elbows on the tables, at the smiles of all my loved ones.

I have wonderful memories of my Mom and I cooking our family feast in her kitchen. While my Dad sang Silver Bells in the background (happy to be the errand boy), Mom and I would talk for hours as we wrestled with the bird and happily cooked our way through our family-favourite casseroles and all the fixings of a holiday feast. I loved it when my Mom asked me to taste-test her stuffing: “is there enough butter, onion, broth, sage?” It was just a simple Sage and Onion Bread Stuffing recipe from her Better Homes & Gardens cookbook, but my mom knew how to season it just right.

My Mom was very modest about her cooking abilities – yet to this day, I have never tasted a better Chicken Divan, potato-egg salad, turkey stuffing, or apple crisp. We all have our favourite recipes made by our mothers that we grew to love so much.

My sisters and I have taken over the cooking for my side of our ever-expanding clan. We make the traditional, family-favourite recipes that Mom used to serve: my aunt’s Swedish Potatoes, Mom’s Sage & Onion Bread Stuffing, and Vegetables Supreme (from the first Fare for Friends cookbook). I only recently perfected my Grandma’s Stained Glass Window Cake recipe, which I cooked from a recipe scribbled down too hastily on a scrap of paper – it took me a couple of tries to get it right. I have my Nana’s Carrot Christmas Pudding recipe that I may try to make this Christmas. It’s so important to accurately record these heritage recipes to pass down to future generations.

On that note, I have a really great idea I want to share with you. Why not create your own cookbook of treasured family recipes, photos and stories, and then give copies to family members as Christmas gifts? It’s far easier than it sounds. I have come across a fabulous website – HeritageCookbook – that allows you to easily create your own cookbook on-line, with a minimum order of only four cookbooks. Become a free trial-member for 30 days and invite as many people as you want to submit recipes and photos from their own computer, by logging on to your registration. You’ll have access to HeritageCookbook’s templates, photo library, and support. Most people complete their cookbooks within the free-trial month but if you don’t, the monthly fee is minimal. When you are finished, the cookbooks are printed on quality, coated paper with laminated covers.

Though their customer base is largely American (the pricing on the website is in American funds), the company is Canadian-owned and the books are printed in Toronto. HeritageCookbook has printed over 200,000 quality cookbooks and has been recommended by Oprah, Rachel Ray, and one of my friends. The wheels are turning in my head. Which project shall I start with: a family treasury, a church fundraiser, or perhaps my own Olive to Eat cookbook? I can’t wait to get started.

To both sides of our family – near and far, from the other side of the continent to the other side of the Atlantic, and to those we hold close in our hearts – I’m so grateful for the memories, old and new. Happy Thanksgiving.

Mom’s Sage & Onion Bread Stuffing

Serves 4 to 6

This recipe is from my Mom’s Better Homes & Gardens cookbook that she received as a wedding gift back in 1954. She made it every Thanksgiving and Christmas. The key to this simple, classic stuffing is to season it to your taste – but make sure you use lots of butter and sage. We always add more of each ingredient than the recipe calls for but never measure – so start out with the recipe, then slowly add more, tasting as you go along, until it tastes just right.

Since the recipe only serves 4 to 6 people, you will likely need to multiply the recipe for a larger feast. If you are stuffing your turkey, calculate 1 cup of stuffing for 1 pound of uncooked turkey; don’t stuff your turkey until you are ready to put it in the oven; promptly remove any leftover stuffing from the cooked carcass and store separately in the refrigerator. I have heard a lot of talk lately about cooking your turkey unstuffed and cooking the stuffing in a separate baking dish. By the time you get the stuffing in the turkey’s cavity heated to a safe internal temperature of 165°F, you dry out the poor bird. Makes sense to me, so my recipe instructs you to cook it in a separate casserole while the turkey rests.

Ingredients:

4 cups dry bread cubes – “stuffing croutons” that grocery stores bring in for the holidays

3 tablespoons (or more) finely chopped yellow onion

1 teaspoon (or more) salt

¼ teaspoon (or more) freshly ground black pepper

¼ teaspoon (or more) poultry seasoning

¼ teaspoon (or more) ground sage

1/3 cup (or more) melted butter

Hot chicken broth or water, just enough to moisten the bread

Directions:

  1. Combine bread, onion, and seasonings in a large bowl; add butter and toss. Slowly add hot broth, bit by bit, until bread is just moistened. Taste and if necessary, add more onion, broth, butter, or seasonings, until seasoned to your taste. Toss gently to mix thoroughly.
  2. Place stuffing mixture in an ovenproof casserole; cover and chill until ready to bake.
  3. Preheat oven to 350°F. Bring stuffing casserole to room temperature before placing in preheated oven. Bake, covered, until hot throughout and flavours have melded together – about 30 to 45 minutes. Serve warm.

Mom’s Apple Crisp

Makes one 9”-square baking dish.

I have my Mom’s handwritten copy of this recipe. She called it Apple Crisp – Dad’s Favourite and included a little story about the recipe’s origin – it was submitted to St. Andrews United Church in Chatham, by the mother of my aunt’s boyfriend in grade 4 in 1942.

Apple Crisp

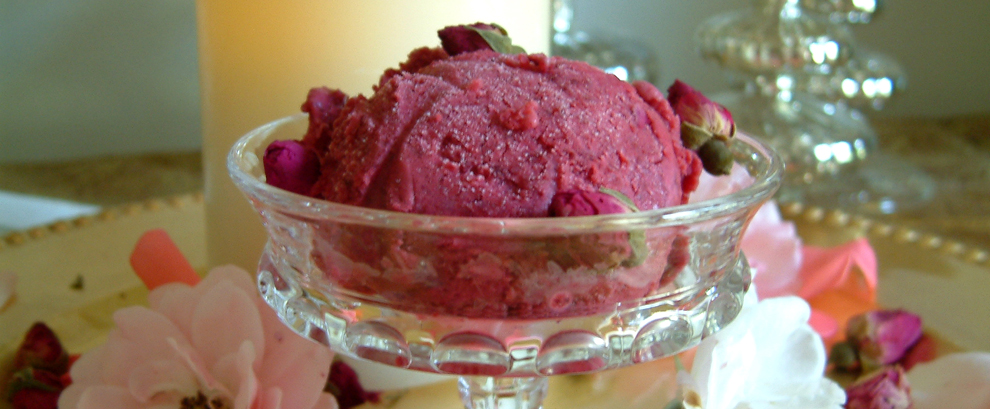
This is an easy – and I think more delicious – way to enjoy warm apple pie without the fuss of the crust. It is packed with tart apples and brown sugar and has a crumbly, cinnamon-scented streusel topping. The butter, spices, apple juices, and brown sugar meld together in a delicious mélange that caramelizes around the edges. It smells so wonderful cooking. Serve warm with vanilla ice cream – or perhaps Belly Ice Cream’s Caramel and Sea Salt.

A note on cinnamon: thanks to some helpful advice from Chef Michael Smith, I have fallen in love with Vietnamese cinnamon. I couldn’t get my hands on the brand that Chef Michael uses but found McCormick Gourmet Organic Ground Saigon Cinnamon at my local grocery store – Longo’s Glen Erin. I compared the taste between Saigon Cinnamon, regular cinnamon, and a third gourmet organic cinnamon I picked up at another grocery store, all very recently. To me, the Saigon Cinnamon is the most aromatic, flavourful, and spiciest of the three cinnamons. Olive it! Thank you Chef Michael Smith!

Apple Crisp

Ingredients:

Filling:

5 cups cored, peeled, and very thinly sliced apples (about 6 to 8 apples, ask your farmer which available apples are best for apple crisp)

¾ cup packed light brown sugar

Dash of grated nutmeg

Topping:

½ cup packed light brown sugar

¾ cup all-purpose flour (measured by spooning in, then leveling off with a knife)

½ teaspoon ground cinnamon (preferably Vietnamese cinnamon)

Pinch of salt

4 tablespoons cold unsalted butter, cut into small cubes

Directions:

  1. Place oven rack in middle of oven; preheat oven to 375°F.
  2. In a large bowl, toss the apples with ¾ cup brown sugar and dash of nutmeg until evenly coated. Pour filling into a 9” square baking dish and level gently with a spatula.
  3. Add all topping ingredients (except butter) to a medium bowl; stir to combine evenly. Add butter to bowl; blend with your fingertips or a pastry blender to break down the butter into the flour until the mixture becomes crumbly, resembling coarse breadcrumbs without any large chunks of butter. Sprinkle topping mixture evenly over apples.
  4. Bake until apples are tender and topping is browned, about 35 minutes. Let rest 5 to 10 minutes before serving.
  5. Spoon into pretty cups and serve warm with vanilla ice cream or cold with whipped cream.

Read More