main dishes tagged posts

New Year’s Dinner: Roasted Beef Tenderloin with Red Wine Drizzle and Thyme Roasted Potatoes

‘Tis the morning after Christmas and all through the house,
Not a creature is stirring, not even a mouse.
The wrappings were strewn all about with great flair,
Now Dad snores loudly in his favourite chair.

The dog is nestled all snug in his bed,
While visions of squirrels dance in his head.
And my son in his PJs, cuddled in my lap,
Has just settled his brain for a long winter’s nap.

When in my mind, there arises such a clatter,
I spring from the couch to try to fix the matter…
After turkey and tinsel, we are all tuckered out,
But now there’s New Year’s dinner to fret about!

Keep calm and carry on, Olive has got you covered:

Roasted Beef Tenderloin with Red Wine Drizzle and Thyme Roasted Potatoes

I served this menu one year for my cherished bro and his dear family when we gathered around his cottage dinner table a couple of days before Christmas. The meal was easy, flavourful, and festive. My son thrilled to be surrounded by his cousins; my brother cracking all of us up with his incredible sense of humour; me, happy to be at his side…the evening forever sings in my heart. Consider splurging a little and serving this festive feast to your loved ones to celebrate the New Year. Wishing you a healthy and happy 2014.

A festively-coloured trio of vegetables made this menu extra special. Laura Calder’s Thyme Cream Tomatoes (from her Buckwheat Crêpes with Thyme Cream Tomatoes recipe) are simple yet sublime. I learned from Ricardo how to sauté frozen peas (straight from the freezer) in a few tablespoons of butter or olive oil, and then season with salt (sorry, can’t find his recipe anywhere on his site but that’s all there is to it). And of course, I served my brother’s favourite Sweet-Sour Purple Cabbage with Apples (which I made ahead and froze).

We started out with a recipe for the beef tenderloin but felt it needed tweaking, so Jane winged it from there; it turned out beautifully but of course, we didn’t write it down. Since then, I’ve tested a few recipes, selected what I liked from them, and combined them into this recipe.

Beef_Tenderloin

Roasted Beef Tenderloin with Red Wine Drizzle and Thyme Roasted Potatoes

Serves 4 to 6

This meltingly tender yet flavourful beef tenderloin drizzled with a red wine and beef stock reduction is wonderful served with some crumbled blue cheese on the side and Thyme Roasted Mini Potatoes.

Get the potatoes in the oven first and then prepare the beef; remove the potatoes from the oven when done and let them rest at room temperature. When the beef has finished cooking, return the potatoes to a 250°F oven to warm up while the beef has a good long rest.

Thyme Roasted Potatoes

Ingredients:

3 lbs. mini Yukon Gold potatoes
2 tablespoon olive oil, divided
1 teaspoon coarse salt, divided
3 teaspoon chopped fresh thyme, divided

Directions:

  1. Place both oven racks in middle of oven, leaving enough room between to fit a tray of potatoes. Preheat oven to 375°F.
  2. Cut potatoes in half; divide evenly between two parchment-lined, rimmed baking trays.  Divide oil, salt, and thyme evenly between both trays; toss on potatoes, turning with your hands to coat evenly. Arrange potatoes cut side down and evenly spaced out on trays.
  3. Place one tray on each oven rack; bake until tender and cut side is golden brown, about 25 to 30 minutes, rotating trays between both racks after 15 minutes.

Roasted Beef Tenderloin with Red Wine Drizzle

Butcher Bob at Burton Meats (Dundas St. location) sold me a superb beef tenderloin. He recommended that I sear the tenderloin first, and then cook it at a lower temperature of 375°F (contrary to many recipes that instruct the beef to be cooked at 450°F). He was right; it was so tender that I actually could cut it with a fork. Be sure to buy the No Salt Added beef broth (even low sodium will be too salty).

Ingredients:

1 whole beef tenderloin 3-lbs
Coarse salt to taste
Freshly ground black pepper to taste
1 tablespoon olive oil

Rub:
1 teaspoon white sugar
2 cloves garlic, finely minced
1 tablespoon chopped fresh thyme
1 tablespoon Dijon mustard
1 tablespoon low sodium soy sauce
3 tablespoons butter, softened

Drizzle:
1 ⅓ cup good red wine
1 tablespoon tomato paste
⅔ cup Campbell’s No Salt Added Beef Stock or homemade beef stock
1 tablespoon butter

Accompaniment:
Crumbled mild, creamy blue cheese and/or horseradish

Directions:

  1. Preheat oven to 375°F. Season beef lightly with coarse salt and generously with freshly ground black pepper.
  2. Heat oil in a large non-stick skillet over medium heat; when oil is hot, sear beef on all sides until evenly browned, about 1½ minutes to 2 minutes per side. Place meat on a rack in a roasting pan that can also be used on stove top.
  3. In a small bowl, combine Rub ingredients; spread evenly over meat. Insert an oven-proof thermometer in middle of tenderloin; roast until thermometer reads 130°F, about 25 minutes (it will continue to cook as it rests) – the end result will be medium-rare, slightly on the rare side.
  4. When beef is cooked as desired, carefully remove roasting rack and beef to a rimmed baking sheet while protecting your hands and any surfaces that come in contact with the hot rack (you want the meat to rest on the rack and not a flat surface); tent loosely with foil to keep warm; let rest for at least 20 minutes.
  5. Meanwhile, drain fat and any clumps from roasting pan. Place roasting pan on stove over medium heat. Add wine to pan; deglaze pan with wine, scraping any brown bits on bottom of pan with a wooden spoon to incorporate into sauce. Simmer rapidly over medium heat, stirring constantly so garlic doesn’t burn until reduced, about 5 minutes. Add tomato paste to pan; cook, stirring constantly, for 1 minute. Add beef stock; simmer rapidly, stirring frequently until reduced by half and thickened, about 4 minutes. Remove pan from heat; whisk in butter, stirring until fully incorporated.
  6. Slice beef thickly and serve immediately with sauce and accompaniments.
Read More

Olive’s Keep Calm & Carry On Christmas Survival Guide: Christmas in Paris – Easy Chic Brunch

Christmas in Paris

My friends and I have gathered together for Christmas brunch every single year since record albums were the coolest Christmas gifts.  This year, I decided to treat them to Christmas in Paris – one of my friends opened up her lovely Georgetown home and I threw together an easy, chic brunch with a French twist. I gathered ready-made gourmet treats from local artisans, made a couple of recipes ahead of time (inspired by a famous Parisian pastry chef and a French cookbook writer), and prepared two showstopper, easy-assemble salads. Throw on a scratchy recording of Edith Piaf’s La Vie en Rose et voilà, it’s Christmas in Paris through rose-coloured glasses.

Champage with Wild Hibiscus

Wild Hibiscus Flowers in Rose Syrup served in Champagne:

Wild Hibiscus in Rose Syrup When you combine Christmas and cherished friends at the same table, it’s time to pull out all the stops. I served some extra special treats to nibble and sip on as hors d’oeuvres. Rose syrup is the flavour du jour in Paris and this jar of Wild Hibiscus Flowers in Rose Syrup contains 15 handpicked wild hibiscus flowers packed in syrup made from the natural essence of two dozen Bulgarian roses. Place one flower in the bottom of a champagne flute, add some rose syrup, pour in the champagne and watch the bubbles unfurl the flower – it reminds me of the skirts flying at Le Moulin Rouge. Available as a limited edition production from Crafted Décor in Streetsville and Florence Meats in Oakville.

Pierre Hermé's Olive Sablés

Pierre Hermé’s Olive Sablés served with White Wine or Champagne:

These aren’t just any savoury cookie – they are an utterly surprising savoury French shortbread that will have your guests shocked by the initial sweetness (from the icing sugar), enamoured by the incredible tenderness (from the potato starch and grated egg yolk) and then, when the salty and fruity notes (from the oil-cured black olives and olive oil) hit the stage, you just may hear gasps followed by utterances of ooh la la…as if you were watching the latest Parisian haute couture creation walk down the runway in the city’s top fashion house. In fact, the recipe comes from famous French Pastry Chef Pierre Hermé, who is widely acclaimed as the “Couturier of Haute Pâtisserie”.

I made the dough well in advance and rolled it into logs, then froze them. When ready to bake, I took one log out at a time a few moments before baking, then sliced from frozen and baked. The recipe turned out beautifully – you simply must have it in your repertoire. How does a local gal comme moi get her hands on Pierre Hermé’s recipe? I found it in Dorie Greenspan’s charmingly chic cookbook, Around My French Table, which is available to borrow from the Mississauga Library or to buy from www.chapters.indigo.ca  It’s on my Christmas wish list – I hope my husband is reading my blog posts!

Spirit Tree Cidery's Pâté & Evelyn's Crackers

Spirit Tree Estate Cidery Pâté with Ice Cider & Shallots and Evelyn’s Currant in the Rye Crackers served with Sparkling Pear Cider:

Spirit Tree Estate Cidery Pâté with Ice Cider & Shallots is a superb pâté. Luxuriously smooth and creamy, it’s packed with the flavour of all natural ingredients: chicken livers, clarified butter, shallots, port, brandy, ice cider, Calvados, apple syrup, eggs, and spices. It’s frozen in adorable little 165g ceramic pots. I picked it up from Spirit Tree Estate Cidery a while back and stored it in my freezer, ready for Christmas entertaining. Just defrost overnight in your fridge.

Evelyn’s Currant in the Rye Crackers are the perfect match for this pâté: a hearty yet delicate cracker made with preservative-free, all natural ingredients including dried currants, fennel, anise, and caraway seeds and best of all, 100% heritage organic rye grown and milled by Ontario farmers. Evelyn’s Crackers are made by “cracker heroes” Dawn and Ed – find out what makes them heroes here: www.fiestafarms.ca/heroes.  Available at Whole Foods. For other locations throughout Ontario, click here: http://evelynscrackers.wordpress.com/wheretobuy/.

Spirit Tree Estate Cidery Sparkling Pear Cider Spirit Tree Estate Cidery Sparkling Pear Cider is a refreshing choice for those who are looking for something non-alcoholic: fresh pear, just a hint of sweetness, bubbly, and light.  It’s perfect for special celebrations.  Also available in Sparkling Sweet Apple Cider. Spirit Tree’s Mulled Apple Cider containing chopped fruit and spices would be another great choice and very festive. If you would like to learn a little bit more about Spirit Tree, read my full post here: Spirit Tree Estate Cidery: Savour the Quality.

For the main meal, I laid out an impressive line-up of store-bought gourmet goodies and two easily prepared dishes I made myself that just needed just some minor last minute preparations.

Proscuitto Wrapped Cheese Stuffed Warm Fig Salad with Arugula

Prosciutto Wrapped Fresh Figs Stuffed with Cheese on Arugula

Serves 6

This showstopper, palate-pleasing salad is a cinch to assemble à la minute. The sweetness of the figs and vinegar plays against the salty prosciutto, creamy tang of the blue cheese, and peppery punch of the arugula. If you don’t like blue cheese, feel free to use brie or chèvre instead. I used a beautiful combination of Date Crème Vinegar and Hazelnut Oil that I picked up at Crescendo World of Oils Vinegars and Spices in Toronto’s Distillery district – but extra virgin olive oil and balsamic glaze are also terrific.

Ingredients:

6 fresh figs, sliced in half from stem end to blossom end, keeping stem halves intact
1/3 cup your favourite creamy mild blue such as St. Agur or Devil’s Rock (or chèvre)
6 slices prosciutto, cut in half lengthwise
6 handfuls of baby arugula (or your favourite greens)
Hazelnut oil or extra virgin olive oil
Date Crème Vinegar or balsamic glaze
Sea salt
Freshly ground black pepper

Directions:

  1. Preheat oven to 425°F. Smear cheese on cut side of each fig half. Wrap each half with prosciutto. Store in an air-tight container in the refrigerator up to 4 hours before serving or bake immediately, according to the following instructions.
  2. Arrange cheese side up on a parchment-lined baking sheet. Bake in 425°F oven until prosciutto is crisp and cheese has melted, about 5 minutes.
  3. In a large bowl, toss the greens with some salt, pepper, and oil; spread greens out on a pretty platter; place figs on top and drizzle figs and salad with vinegar. Serve warm.

Quiche Lorraine (with potato, gruyère, and bacon) from Spirit Tree Estate Cidery, butter croissants from Patisserie d'Or, Vodka Infused Smoked Salmon from Cousins Gourmet Market.

Spirit Tree Estate Cidery Quiche:

Make sure you search out the very best handcrafted quiche you can find. Spirit Tree Estate Cidery makes delicious quiche. The Quiche Lorraine is full of hearty flavour from bacon, potato, thyme, and swiss cheese. The Tomato & Spinach quiche has intensely flavoured wood-oven-dried tomatoes, sautéed spinach, thyme, and clumps of soft chèvre, all suspended in a lovely egg custard. I purchased both quiches frozen, stored them in my freezer, and baked them from frozen on the day of the brunch. I haven’t tried their Mushroom & Potato or Cauliflower quiche yet but they sound tempting.

If you can’t make it out to Spirit Tree, good quality quiche can also be found at The Hot Oven in Etobicoke, Cousin’s Gourmet Market in Port Credit, Black Forest Pastry Shop in Oakville, and Kate’s Town Talk Bakery in Streetsville (Kate also sells a really tasty Spinach & Cheese pie – another one of my favourites). Wherever you choose to purchase your quiche, be sure to call ahead to place an order in advance.

Vodka Infused Smoked Salmon:

Drape some luxurious smoked salmon on a pretty platter and garnish with lemon wedges and perhaps, capers, sliced onion, and a drizzle of olive oil. My absolute favourite is a locally produced Vodka Infused Smoked Salmon that I buy from Cousin’s Gourmet Market in Port Credit and have also found it at Domenic’s in the St. Lawrence Market. It is so tender, that it almost melts in your mouth.

Artisanal Croissants:

What would Christmas in Paris be like without really good croissants? I picked up frozen chocolate and butter croissants handcrafted at Patisserie D’Or in Oakville, stashed them in my freezer, took them out to rise overnight, then baked fresh the morning of the brunch –you can’t get easier or more delicious than that. Boy did my kitchen smell heavenly! These croissants have a buttery flavour and a nice mouthfeel.

And now for the grande finale…

Macarons from Whole Foods

French Macarons:

Buy a colourful assortment of the very best French macarons you can find. I picked up these little beauties from Whole Foods, made by La Fournette Bakery: mango, passion fruit, vanilla, raspberry, pumpkin, chocolate, pistachio, and my favourite – hazelnut.
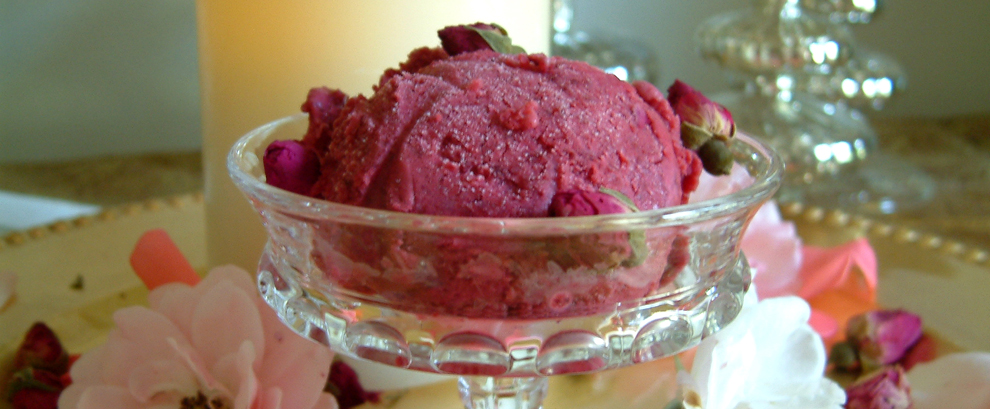
Ispahan Parfait

Ispahan Parfait

Serves 6

This showstopper fruit salad was inspired by the beautiful flavour combination of raspberries, lychee and rose, created by famous French Pastry Chef, Pierre Hermé, as a macaron flavour, and now all the rage in Paris. You won’t really notice the rose syrup in this gorgeous and healthy parfait – just a hint of je ne sais quois. Make both the rose syrup and the pistachio dust in advance (you can even freeze them if you need to). Combine the raspberries and lychees with the syrup at the last minute, or earlier on the day of serving, if necessary. Spoon into pretty glasses and top with yogurt, almonds, and pistachio dust just before serving. Feminine, festive, and fusion-French, it’s perfect for my girlfriends’ Christmas brunch.

If you don’t want to make your own rose syrup, you can order an exquisite Wild Rose Petal Syrup from Forbes Wild Foods, a Canadian company that supplies sustainably-harvested wild foods from the Canadian wilderness to restaurants, hotels, stores, and on-line customers. To order on-line click here:  http://store.wildfoods.ca/syrups/.

Oh to be in Pierre Hermé Paris at Christmas time.

Ingredients:

1 can (560mL) whole lychees in light syrup
1 package (6 oz/170g) fresh raspberries
¼ cup reserved lychee syrup from above can
5 teaspoons Rose Syrup (see recipe below)
½ cup vanilla yogurt – such as Sheldon Creek Dairy’s Greek-style Yogurt (see note below)
6 teaspoons raw slivered almonds
3 tablespoons Pistachio Dust (see recipe below)

Directions:

  1. Drain lychees into strainer set over a medium bowl to reserve lychees and lychee syrup; slice lychees in half. Place lychees in a second medium size bowl. Add raspberries to lychee fruit.
  2. In a small bowl, combine ¼ cup lychee syrup and 5 teaspoons rose syrup; add to lychees and raspberries and toss gently. Divide fruit evenly amongst 6 small pretty cups; spoon in a little syrup.
  3. Place 1 spoonful of yogurt on top of each cup. Top each with 1 teaspoon of slivered almonds and then 1/2 tablespoon pistachio dust. Serve immediately.

Rose Syrup:

Makes just over 1/3 cup.

You’ll need rosewater, which you can find in Middle Eastern grocery stores such as Adonis. Store your rosewater and rose syrup in the fridge.

Ingredients:

1 cup water
½ cup granulated white sugar
1 tablespoon lemon juice
1 teaspoon rosewater

Directions:

  1. Combine water and sugar in a small saucepan; bring to a boil, simmer rapidly, stirring occasionally, until mixture has reduced and become syrupy, about 10 minutes. Remove from heat; stir in lemon juice and rosewater. Let cool completely.
  2. Store in a covered container in refrigerator for a few days or freeze in an airtight container for longer storage. Defrost in fridge before using.

Pistachio Dust:

So pretty sprinkled on fruit salad, especially on raspberries or strawberries at Christmas time.

Ingredients:

1 cup shelled raw pistachios

Directions:

  1. Using a mini processor, grind pistachios into a fine dust. Store in an airtight container in freezer until ready to use.

Sheldon Creek Dairy Fresh Milk & Greek Style Yogurt A little decadence is called for here, so look for the richest yogurt you can find. Spirit Tree Estate Cidery sells a luxuriously creamy Greek Style Vanilla Yogurt from Sheldon Creek Dairy, made with pasteurized whole milk, light brown cane sugar, vanilla extract, and bacterial culture – and nothing else! Sheldon Creek Dairy’s pasteurized Cream Top Whole Non-Homogenized Milk is nutrient-rich, all natural, and has cream that rises to the top of the bottle and separates (how milk was made before we homogenized it): shake it in the bottle for creamier milk or spoon out to add to your coffee.  Sheldon Creek Dairy is owned and operated by the den Haan family whose herd of cows graze the pastures of the Sheldon Valley, in Loretto, Ontario. Click here for other retail locations: http://sheldoncreekdairy.ca/about.php.

For further details and locations of suppliers featured in this post, check my Grocery Store Directory or Farmers’ Market Directory.

To further enhance the mood, you may wish to play the following music suggestions:

White Christmas Michael Buble & Shy’m https://itunes.apple.com/gb/album/white-christmas-duet-shym/id472520445

Noel Blanc Coeur de Pirate https://itunes.apple.com/ca/artist/c-ur-de-pirate/id290621195

Read More

Olive’s Keep Calm & Carry On Christmas Survival Guide: Chestnut Stuffed Veal Marsala with Crisp Sage Leaves

Dazzle your dinner guests with my delicious, and definitely festive, Chestnut Stuffed Veal Marsala. The sweet vanilla notes from the chestnuts in the stuffing marry beautifully with the added hint of vanilla in the Marsala wine sauce (which is a breeze to make).

Chestnut_Stuffed_Veal_Marsala

Chestnut Stuffed Veal Marsala with Crisp Sage Leaves

Serves 4 (6 veal rolls – 1 ½ rolls per person)

The stuffing can be made ahead and freezes well. However, if you are making the stuffing on the same day you are serving the veal, treat your guests to crisp sage leaves – a great way to use up the rest of the sage.

Crisp Sage Leaves (optional garnish)

Be sure to set aside 8 sage leaves to use in the stuffing, before you fry up the remaining leaves. Fry just before you prepare the veal, then set aside at room temperature.

Ingredients:

¼ cup olive oil
1 bunch fresh sage, large stems discarded, leaves dried thoroughly (save 8 sage leaves to use in stuffing)
Sea salt to taste

Directions:

  1. In a small sauté pan over medium heat, heat oil until hot but not smoking. Carefully add leaves to pan, one at a time to make a single layer (you will have to fry leaves in at least two batches); fry for 5 to 7 seconds – leaves will crisp up as they cool; immediately remove leaves from pan with a slotted metal spatula to a paper towel-lined plate.
  2. Repeat with remaining leaves. Season with sea salt. Serve at room temperature.

Chestnut Stuffing

This stuffing can be made a day ahead or even frozen for up to 2 weeks; defrost completely, in the refrigerator overnight, before stuffing veal. Look for peeled, ready-to-eat chestnuts in packages in the produce or international section of your local grocery store. Here is a link to the brand I’ve been using, which is available at Loblaws and Longo’s: www.dan-d-pak.com/products/chestnuts-2/

Ingredients:

3 tablespoons unsalted butter
½ small yellow onion, finely chopped
1 celery stalk, finely chopped
8 sage leaves, finely chopped
1 clove garlic, minced
1 package (100g) peeled, ready to eat chestnuts
⅓ cup panko bread crumbs – whole wheat or white
½ teaspoon coarse salt
Freshly ground black pepper

Directions:

  1. Melt butter in a large non-stick skillet over medium heat; add onion and celery and sauté, stirring frequently, until soft, about 5 minutes. Add sage and garlic; sauté, stirring constantly, for 1 minute. Remove pan from heat.
  2. Finely chop chestnuts in small food processor; add to onion mixture in pan. Add bread crumbs, salt, and pepper. Stir well then remove to medium-sized bowl.
  3. Let cool before stuffing veal. Stuffing can be made ahead and stored in an airtight container, in the refrigerator overnight or frozen up to 2 weeks. Defrost thoroughly in refrigerator overnight and bring to room temperature before stuffing veal.

Veal:

If you’ve made the stuffing ahead, all that is left to do is to stuff, roll, and cook the veal and sauce –which should be done just before serving. Give yourself enough time to roll the veal. It’s easy to do if you are not panicked. I don’t fuss with string (but feel free if you like); and toothpicks would prevent the rolls from being properly seared. To keep the rolls from opening, roll the veal up tightly, tucking the sides in while rolling and pulling the end snug around the roll; then be sure to sear seam side down first and handle gently with tongs. If your veal is long and narrow and you cannot tuck the sides in as you roll, don’t fret; if you handle the veal rolls gently, an insignificant amount of stuffing may fall out into the pan while searing – just be sure to scrape it out when you drain the fat out of the pan.

This recipe calls for dry (not sweet) Marsala, which is a fortified wine. Sperone Fine I.P. Dry Marsala from Italy (available at LCBO) works well in this recipe and is nice to sip on. Campbell’s has added a No Salt Added broth to their line of ready-made, tetra pack chicken and beef broths. Be sure to use it or homemade chicken stock for this recipe; reducing the sauce intensifies its saltiness; low sodium and regular ready-made broths are too salty. The amount of Marsala and broth will seem like a lot but the sauce reduces down to ⅔ cup, which is just enough.

Ingredients:

6 veal scaloppini, ¼” thick and ideally wider rather than long and narrow
Coarse salt and freshly ground black pepper to taste
3 tablespoons all-purpose flour
1 tablespoon olive oil (you can use the same oil you cooked the sage in)
1 tablespoon butter

Sauce:
2 cups dry Marsala wine (not sweet)
1 cup no salt added chicken broth or homemade broth
½ teaspoon vanilla

Final Touches:
1 teaspoon lemon juice
1 tablespoon butter, optional

Directions:

  1. Season one side of veal with salt and pepper. Place about 3 tablespoons of stuffing in the centre of the one scaloppini; spread out evenly to within ¼” of edges; roll up tightly, tucking sides in as you roll if you can, and pulling end snugly around roll. Repeat with remaining rolls. Dredge rolls lightly in flour.
  2. Heat oil and butter in a large non-stick skillet over medium heat. When the foaming butter begins to settle down, shake off excess flour and place veal rolls in skillet seam side down and sear just until golden brown, about 30 seconds; using tongs carefully flip to the other side and sear until golden about 30 seconds more; repeat with remaining 2 sides. Remove veal to a plate; cover with foil to keep warm.
  3. Carefully drain fat from pan. Return pan to medium heat; add sauce ingredients; adjust heat to a low simmer. Return veal to pan; cover and simmer gently until cooked through, about 6 minutes, turning gently with tongs every 2 minutes. Leave sauce in pan but remove veal to a plate and cover with foil to keep warm.
  4. Increase heat to medium high, bring sauce to a boil; boil rapidly, stirring frequently, until reduced and thickened, about 15 minutes; skim out any bits with skimmer. Remove from heat and stir in final touches. Return veal to pan briefly, just to roll in sauce to evenly coat and to warm through.
  5. Place 1 veal roll on each dinner plate; carefully slice the remaining two rolls diagonally in half; place ½ roll on each dinner plate. Strain sauce and pour into a small (1 cup) pitcher to serve on the side. Serve immediately with Crisp Sage Leaf garnish and instruct guests to drizzle sauce over veal.


Read More

Streetsville United Church Fall Craft Show: Chili Con Carne

I often think of the women of my church as the Divas Who Dish Divinely. After countless bake sales, church luncheons, and casseroles for friends in need, years of practice have perfected their “from-scratch” recipes and turned them into best-in-show treasures.

The Divas Who Dish Divinely (AKA Streetsville United Church Women) will be dishing up some delicious food again at the 46th annual Streetsville United Church Harvest of Crafts Sale, this Saturday October 26, 2013 from 9:30 a.m. to 3:00 p.m., at Streetsville United Church.

Olive the Streetsville United Church Harvest of Crafts Sale because it invites the surrounding community to come together under one roof. Our fundraising efforts help support various local outreach programs. And of course, the food is delicious.

Our all-day café offers you a spot to sit, chat, and replenish your shopping-weary soul. Several women make their own batches of chili con carne and chicken soup, then combine them all into one heavenly pot of chili and one ethereal pot of chicken soup. Sandwiches, salads, and homemade desserts are made with care.

Make the baking table your first stop: delectable pies, cakes, cookies, and squares are all made from scratch and sell out quickly. Our local harvest is preserved in pretty jars to enjoy throughout winter. The sale is brimming with creative and witty, inexpensive crafts made by the talented Streetsville United Church Women. Local artisans offer a variety of unique, handcrafted gifts. There is always a special find in the Attic Treasures collection of gently-used modern and vintage finds. Come and get your Christmas shopping done early.

After working all day at the craft show, while the aroma of simmering chili wafts from the kitchen, I come home tired and craving chili. Here is my recipe.

chili_con_carne

Chili Con Carne

Serves 8

This classic chili simmers for five hours but it is much more flavourful cooked slowly and lovingly on the stovetop than abandoned in a slow cooker. Start it early in the day, refrigerate overnight, and reheat gently the next day to further deepen the flavour. If you have two large pots, you can double the recipe and stock your freezer with chili to warm up the chilly months that lie ahead.

I learned this old Southern tip from my friend, Bill, (who learned it from his friend from Kansas City): gently stir in a tablespoon of peanut butter near the end of cooking to smooth out the acidity and round out the flavour of the chili. For years I made this recipe without the peanut butter and still loved it, so if there is a peanut-allergy concern, leave it out.

Ingredients:

4 tablespoons olive oil

About 2 pounds (1kg) extra lean ground sirloin

2 yellow cooking onions, chopped

6 garlic cloves, finely minced

2 yellow or orange sweet bell peppers, cored, seeded, and chopped

4 celery stalks, chopped

1 28 fl oz/796 mL can diced tomatoes

1 19 oz / 540 mL can red kidney beans, drained, rinsed, drained again

1 28 fl oz/796 mL can crushed tomatoes

1 teaspoon coarse salt

1 teaspoon white sugar

2 tablespoons ground chili powder, to taste

½ teaspoon ground cumin

¼ teaspoon ground cinnamon

2 bay leaves

Finish:

1 tablespoon smooth peanut butter

Freshly ground black pepper and coarse salt, to taste

Few dashes of hot sauce (such as Tabasco or Piri Piri), to taste

Optional Garnishes: shredded cheddar cheese, sour cream, lime wedges, hot sauce, chopped avocado, fresh cilantro leaves, tortilla chips, or garlic bread.

Directions:

  1. Heat a large heavy pot over medium heat; add onions and ground sirloin and brown, breaking up with a wooden spoon and stirring frequently, just until meat is no longer pink inside, about 10 minutes.
  2. Add garlic; sauté for 1 minute, stirring constantly.
  3. Add remaining ingredients, except peanut butter; stir. Partially cover with a lid; simmer for 4 3/4 hours, stirring occasionally.
  4. To finish, stir in peanut butter and simmer, stirring occasionally, 15 more minutes. Remove and discard bay leaves. Season to taste with salt, pepper, and hot sauce.
  5. Let cool and then refrigerate overnight to allow flavours to mellow further. When ready to serve, reheat gently. Serve hot with your choice of optional garnishes.
Streetsville United Church
274 Queen St. South
Mississauga, Ontario
L5M 1L8

Harvest of Crafts Sale Hours: Saturday October 26 from 9:30 a.m. to 3:00 p.m.

Free Admission. Appreciate your support.

View Larger Map

Read More

Backyard Ribfest: Olive’s Kansas City-style Barbeque Ribs

If you can’t make it out to Canada’s Largest Ribfest this weekend (August 30th to September 2nd in Burlington’s Spencer Smith Park), here’s a recipe you can enjoy in your own backyard. Sure to put the smile back on any last-day-of-summer sad face, my Kansas City-style Barbeque Ribs are a great way to end summer vacation.

There are a few easy steps involved but most of the work is done ahead of time, making these ribs perfect for special occasions. My ribs are steam-baked in homemade barbeque sauce and a slow oven the day before, chilled in the fridge overnight, and then finished on the grill for 15 minutes to impart a smoky flavour and a caramelized crust. The end result: tender ribs in a lip-smackin’, finger-lickin’ homemade sauce that is dead-on delicious. And you don’t have to worry about a grill for hours.

My barbeque sauce recipe is Kansas City-style: tangy, sweet and a bit spicy – just the way olive it! Make the barbeque sauce at least one day ahead – the flavours deepen overnight. I make a big batch and freeze it in smaller portions. The acidity of the vinegar in the sauce will be mellowed by the richness of the meat – both setting each other off perfectly, I think – so don’t judge the sauce until you taste it on the finished ribs.

kansas_city_bbq_ribs

Olive’s Big Batch Kansas City-style Barbeque Sauce

Makes about 7 ½ cups

Delicious on ribs or chicken. Make one day in advance.

Ingredients:

2 tablespoons butter or vegetable oil

4 cloves garlic, finely minced

1 cup water

3 cups tomato ketchup

1 cup apple cider vinegar

⅔ cup Worcestershire sauce

½ cup prepared yellow mustard

1 cup brown sugar, lightly packed

1 cup honey

½ cup hoisin sauce

2 teaspoons hot pepper sauce (Tabasco)

2 teaspoons salt

Directions:

  1. In a large heavy saucepan, melt butter over medium-low heat; add garlic and sauté, stirring constantly, for 1 minute.
  2. Remove the pan from the heat, so the garlic doesn’t burn; add the remaining ingredients to the pot and stir thoroughly with a whisk.
  3. Set the pot back over medium heat and bring to a boil, stirring frequently; immediately reduce heat to medium-low and simmer for 45 minutes, stirring occasionally with a wooden spoon.
  4. Store overnight in the refrigerator to allow the flavours to deepen, or freeze for longer storage. Freeze in 2 cup portions. One 2-cup portion is enough for 2 racks of ribs.

The method I use to cook the ribs (that I learned from a Trish Magwood Party Dish recipe – Sticky Barbeque Ribs) infuses the meat with barbeque sauce. The key is to seal the ribs very tightly in foil and then slow roast them in the oven for two hours until they are fully cooked – you will be rewarded with tender ribs that just need finishing on the grill.

Another key to success is to chill the ribs to firm the meat before grilling them – so after I bake my ribs in the oven, I chill them in the fridge overnight and then put them on the grill cold (straight from the fridge) to finish them. I learned this tip from a cooking show long ago; it has always worked, I didn’t ask why….but then I thought my readers deserved to know the science behind it. So, I went to The Food Lab and asked part-scientist/part-chef Kenji López-Alt (Chief Creative Officer, Serious Eats) for his expert opinion and am grateful to have received his prompt answer which he has allowed me to share with you:

“…chilling increases the viscosity of internal juices which makes them a little firmer so they don’t fall apart. It also lets you char the exterior without drying them out.”

Kenji Lopez-Alt’s weekly column The Food Lab on Seriouseats.com explores the science of home cooking. Click here to read his column, follow him on Twitter or Facebook or send him an e-mail. Thank you Mr. López-Alt!

Ribs should be cooked until they come cleanly off the bone when you bite in but are not falling off the bone when you pick them up to eat them. If you follow my recipe, that’s how your ribs will turn out.

Olive’s Kansas City-style Barbeque Ribs

Serves 4 (half rack portions)

A great make-ahead dish for a summer barbeque party. Prepare these ribs one day prior to grilling them.

Ingredients:

2 racks baby back pork ribs (back membrane removed – ask your butcher or do yourself)

2 cups Olive’s Big Batch Kansas City-style Barbeque Sauce

4 17”-square pieces of heavy-duty aluminum foil

Directions:

  1. Preheat oven to 275ºF. Cut each rib rack in half.
  2. Measure ½ cup of barbeque sauce into a separate container to brush on the raw ribs; do not contaminate the remaining barbeque sauce – refrigerate it for basting the pre-baked ribs on the grill and for serving on the table the next day.
  3. Brush both sides of the ribs with the ½ cup of barbeque sauce, dividing it evenly among the 4 sections.
  4. See instructional photos below. Place one rib section, meaty side up, on the centre of each piece of foil. Fold the sides of the foil up towards the ceiling. Leaving an air pocket on top of the ribs, bring the foil edges together at the top and fold down about ¾”; crimp tightly all along the edge with your fingers to make an airtight package; fold down two more times the same way. Repeat the same process to seal both ends of the packet. Take care not to puncture the foil during this process.
  5. Carefully transfer wrapped ribs to a rimmed baking sheet; place tray on the middle oven rack of a 275ºF degree oven; bake for 2 hours.
  6. After 2 hours, remove ribs from the oven but don’t open the packets; let cool, sealed in their packets, at room temperature for 15 minutes.
  7. Carefully open hot foil packets. Remove ribs from foil and place in a baking dish; discard remaining juices and foil. Cover dish with plastic wrap. Chill ribs in the fridge overnight. Do not remove from the fridge until you are ready to grill – the meat should be chilled thoroughly when you put the ribs on the grill.
  8. When ready to serve the next day, preheat grill to medium heat. Remove the cold ribs from the baking dish and place the ribs directly on a clean, well-oiled grill; immediately baste with barbeque sauce and grill for 5 minutes. Flip and baste again with barbeque sauce; grill for another 5 minutes. Flip and baste with sauce two more times, grilling for about 5 more minutes or until sauce is caramelized, lightly charred, and the meat is hot.  In total, you should have basted 4 times total and grilled for about 15 minutes or so.
  9. Serve remaining ½ cup sauce in a bowl on the table for those who want to brush more sauce on their ribs.
bbq_ribs

Step 1

 
bbq_ribs

Step 2

 
bbq_ribs

Step 3

 
bbq_ribs

Step 4


18th Annual Canada’s Largest Ribfest
Organized by the Rotary Club of Burlington Lakeshore.
Location: Spencer Smith Park in Burlington, Ontario
Dates: August 30th to September 2nd, 2013 
Hours: 11 am to 11 pm Friday, Saturday and Sunday, 11am to 8 pm Monday
All the info you need to know is here: www.canadaslargestribfest.com
Read More